
Requesting access
To request access for yourself, another identity, or a team member, you can use the Genetec ClearID™ self-service portal. By using a self-service portal with specified area managers, you can simplify the approval process and avoid delays from routing requests to the wrong approvers.
What you should know
- The following identities can request access for themselves or their employees using the
self-service web portal:
- Employees
- Managers
- Supervisors
- Unlike older access control systems, ClearID records the:
- Requester
- Site
- Area
- Time
- Reason
- Each area requested generates its own access request and approval workflow.
- After it is confirmed, the request is automatically assigned to the right approvers.
- After the approval process, the requester gets an email notification with the decision.
Procedure
-
In the Who section of the New access request
dialog, choose who needs access:
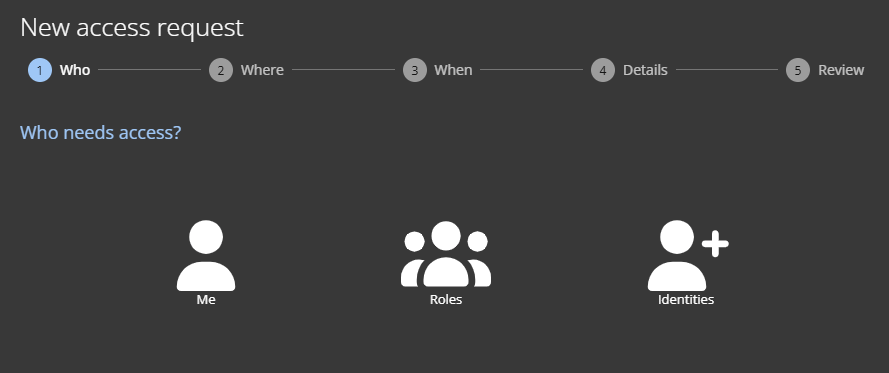
- Me
- The wizard automatically fills in your information.
- Roles
- Search for or select a role. Only role owners or role managers can request access for roles they manage.
- Identities
- Search for or select an identity. Supervisors or team leaders can request access for team, group, or department members.
You can request access for up to 20 roles or identities at a time by clicking Add more.
-
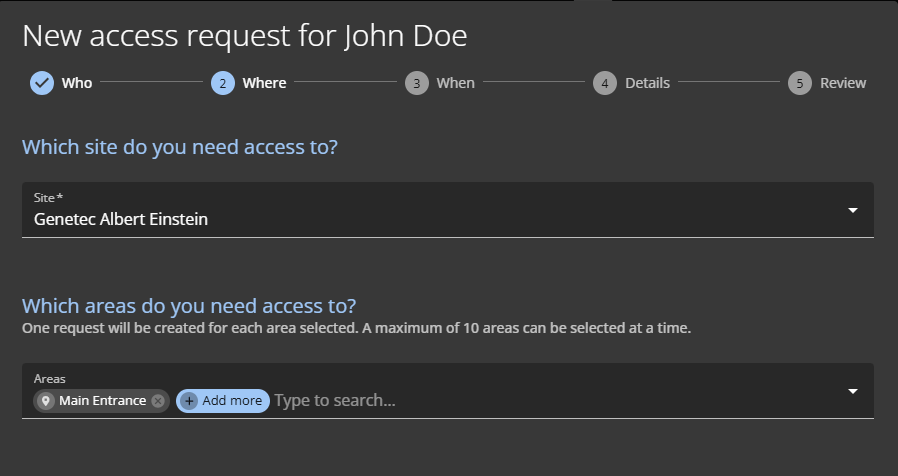
In the Where section, select a site, add areas, and then click
Next.
-
In the When section, enter the required dates, select a schedule
for each area, and click Next.
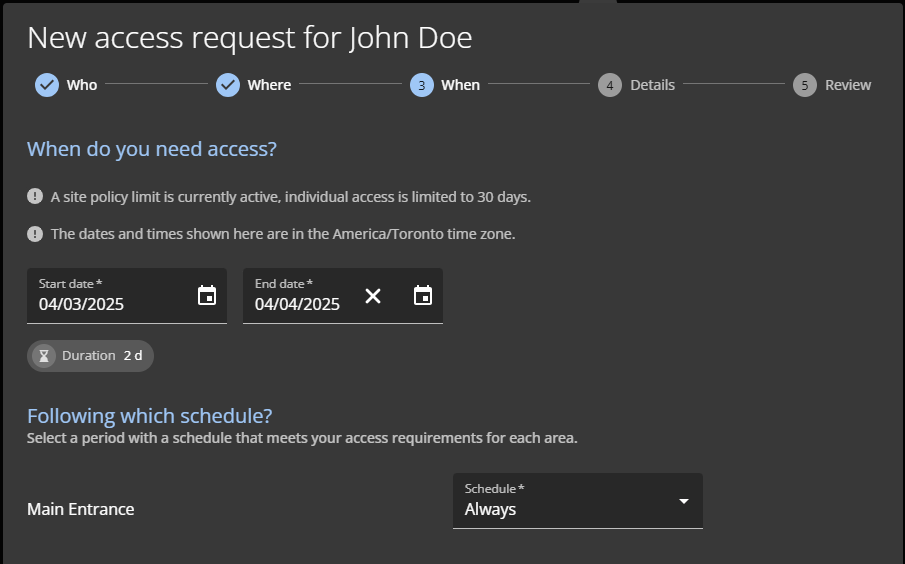 Site access duration can’t be longer than the maximum set in the site’s configuration.
ClearID notifies requesters if the identity or role has access to the area during the selected period. Existing access can have multiple sources, including direct, provisioning policies, or other access requests. Requesters can still choose to submit the access request, but doing so can result in duplicate access.
-
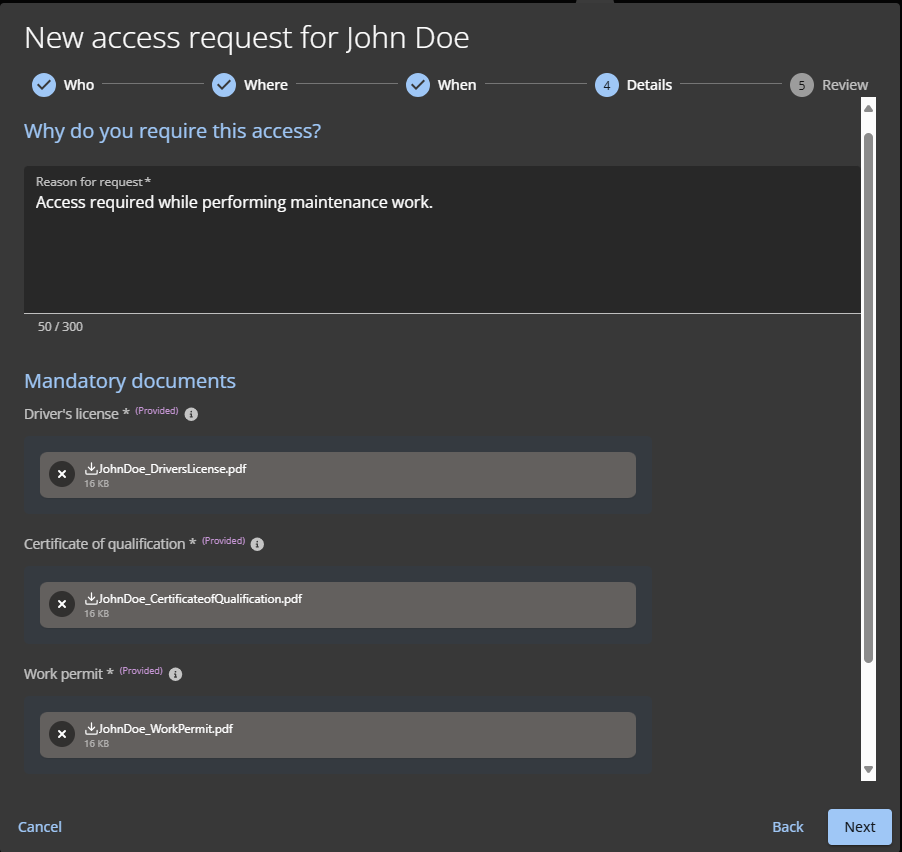
In the Details section, enter the reason for the access request,
upload any supporting documents, and click Next.
To facilitate access review audits, it is mandatory to enter the reason for the request.
Example
After you finish
- Check your email for an Access approved email.
- Check Requests in ClearID.