To streamline frequent identity requests for contractors or large groups of employees
requiring access to specific sites or buildings, Account administrators can create identity
templates in Genetec ClearID™.
You can create identity templates with predefined role access to suit different
requirements.
When an identity request uses an identity template, the identity is added as a member of
the template’s roles and inherits their associated access.
Procedure
Click Organization
> Identity templates.
Click Add identity template.
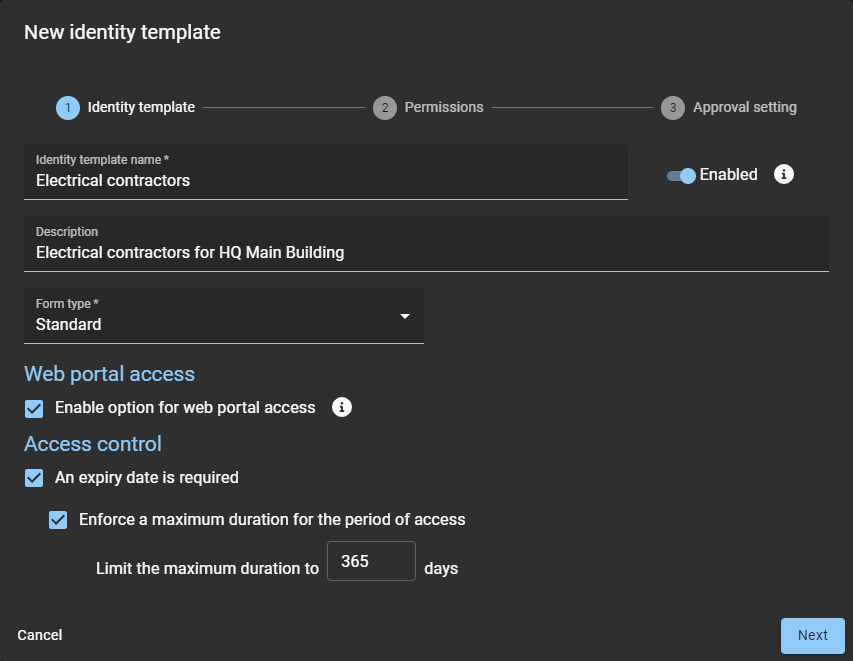
On the Identity template page, complete the fields:
Identity template name
Enter a name that summarizes the type of identity requests that the template is
intended for.
Description
Enter a meaningful description that describes the purpose of your template.
Form type
Standard is the default.
Enabled
Turn on to make the template available when requesting an
identity.
(Optional) In the Web portal access section, select
Enable option for web portal access.
When enabled, the web portal access option is displayed when requesting an
identity.
When requesting multiple identities, the availability of the web portal
access option is dependent on your template configuration.
If not included, related fields are ignored.
If included, related fields are processed.
In the Access control section, configure as needed.
An expiry date is required
Forces requesters to choose an end date for the access period. Use this for
temporary or contractor identities where access must automatically expire.
Enforce a maximum duration for the period of access
Caps the total length of access that can be requested. This prevents overly
long or indefinite access requests.
Limit the duration to nnn days
Specify a maximum duration to ensure access stays within policy. For example,
365 days.
Click Next.
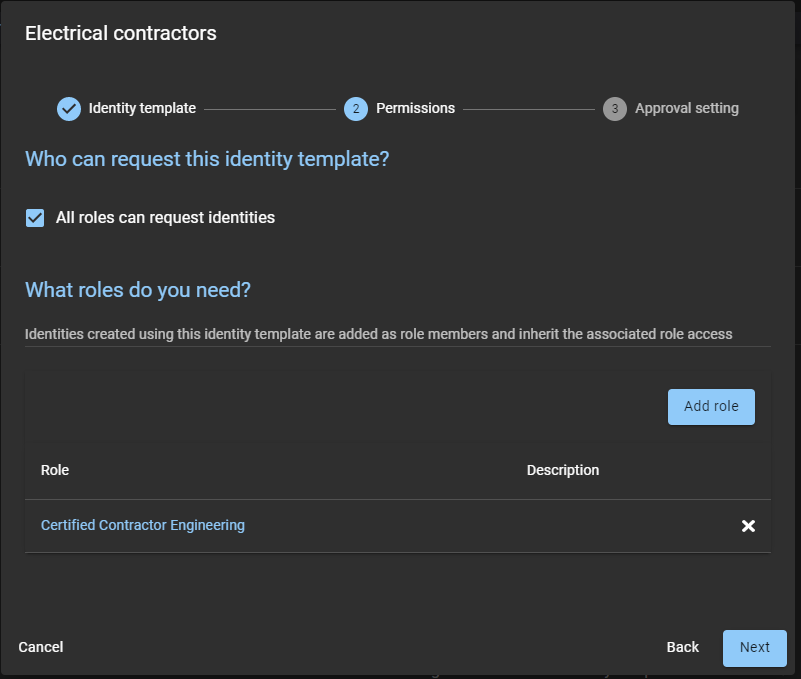
In the Permissions section, select who can request
identities:
Select All users can request identities and proceed to step
6.
Click Add role and select specific roles.
Select one or more roles and click Add.
The roles added in this section determine who can request identities using this
template. For example, you might add a role, so that only Contractor managers can
request identities.
(Optional) In the What roles do you need? section, add
roles:
Click Add role.
Select one or more roles and click Add.
The roles added in this section determine the access that the identity inherits
when it is requested with this template. For example, an electrical contractor role
could be setup with access to rooms containing electrical infrastructure.
Click Next.
In the Approval setting section, select the required approval
workflow.
No approval required
Automatically approved.
Supervisor approval required
Approved by the Supervisor of the requester.
If the requester has no
supervisor, or is a trusted requester, the supervisor approval step is
bypassed.
Identity approvers approval required
If selected, identity approvers must be added.
Click Add and choose either Add
identities or Add roles.
Complete the steps as prompted.
Supervisor and identity approvers approval required
If selected, Supervisors are already associated with the identity;
however, the identity approvers must be added as described previously.
API approval
API approval is only used for workflows from external services.
For example,
Genetec ClearID™ LDAP Synchronization Agent, Genetec ClearID™ One Identity
Synchronization Tool, or an API workflow for a plugin integration. In this
situation, the request approvals are not shown in the ClearID user
interface.
Requests made via the ClearID web portal still appear in
My requests.