
Granting additional permissions for identities and roles
2026-04-29Last updated
To provide users with more access than the default Genetec ClearID™ permissions allow, an Account administrator can grant additional permissions to identities and roles.
Procedure
- From the Home page, click .
- Click Add permissions.
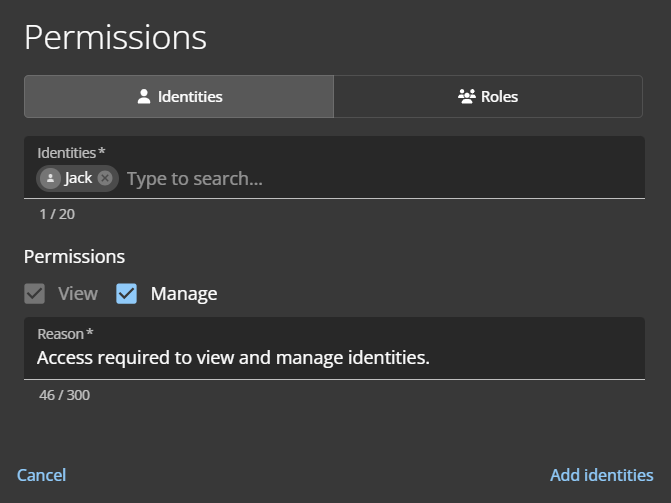
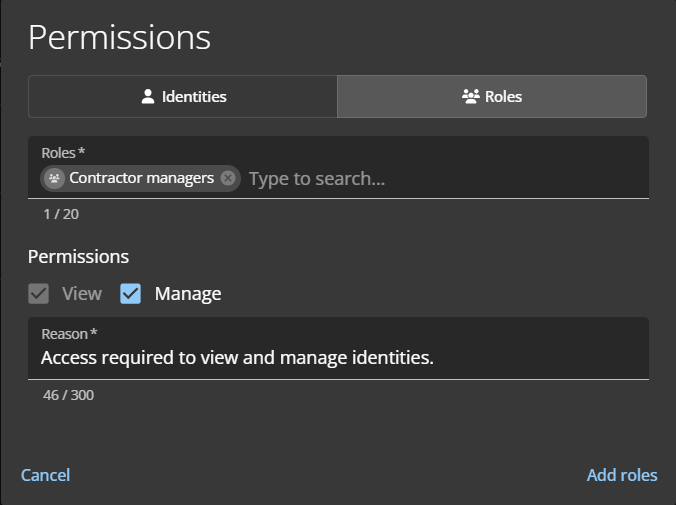
- In the Permissions dialog, select either Identities or Roles.
-
If you selected Identities, complete the following:
-
In the Reason field, explain why the access is being
granted.
-
In the Reason field, explain why the access is being
granted.
-
If you selected Roles, complete the following:
-
In the Reason field, explain why the access is being
granted.
-
In the Reason field, explain why the access is being
granted.
- To submit your changes, click Add identities or Add roles.