To add multiple new people to the system simultaneously using spreadsheet data and
trigger automated workflows, an authorized user can request multiple identities with a CSV
import in the Genetec ClearID™ self-service portal.
What you should know
Only users with the required permission can submit an identity request.
Each identity requested generates its own request and workflow.
Requests are automatically routed to the right approvers.
You’ll receive an email once your request is approved or rejected.
In ClearID, identity requests include:
Requester
Time of request
Reason for request
For auditing purposes, the reason for identity requests are recorded.
Procedure
Log on to the self-service portal.
Click My workspace
> Requests.
Click in the navigation pane, or click the
New request button.
In the New request dialog, click Request multiple
identities.
In the Basic information section, complete the fields.
Request name
Enter a meaningful name for tracking in My requests or
My tasks.
Supervisors
Select up to 20 supervisors. The requester is added by default.
Template
Select an identity template.
Reason for request
Enter a reason for the request.
Click Next.
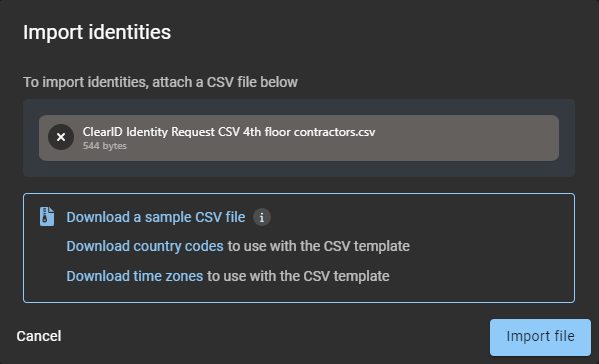
In the Import section, click Import from
CSV.
You can import a maximum of 1000 identities per identity request.
Choose one of the following:
Use an existing CSV file.
Download a sample CSV file.
If you chose to use an existing CSV file:
Drag and drop a CSV file, or click Browse to select
one.
Click Import file.
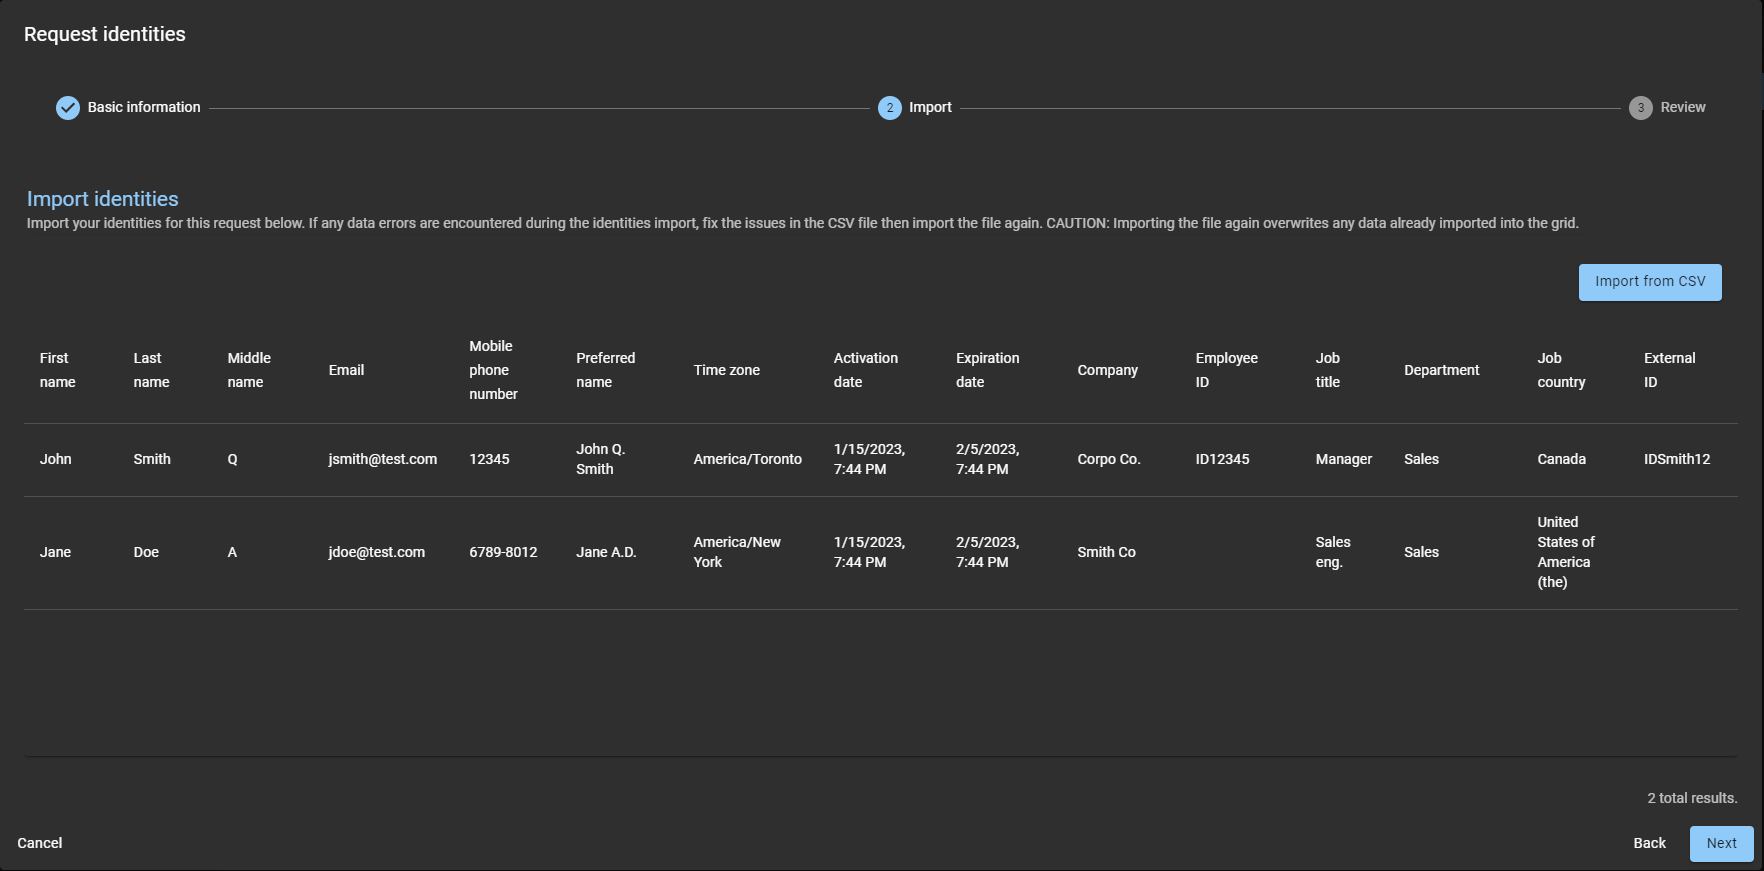
Review the imported identities data and check for any errors, and click
Next.
Web portal access fields are applied only if enabled in the template configuration.
The following example shows imported identities that
do not include web portal access.
The following example shows imported
identities that include web portal access.
If any errors are encountered in the imported CSV file, they are highlighted in
red.
Any corrections must be applied in the CSV file and then imported again.
Correcting errors overwrites the imported data.
If the list of errors is long, you can use the Show errors
only slider.
In the Review section, review the information to ensure that
everything is correct and click Finish.
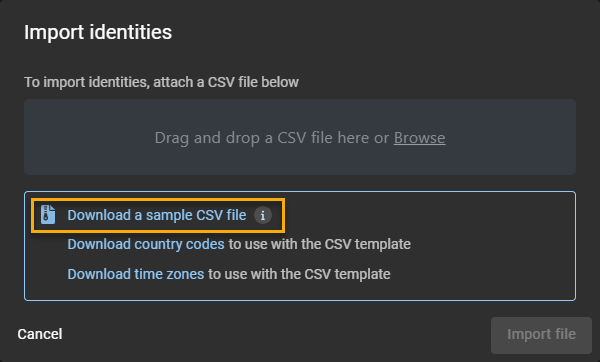
If you chose Download a sample CSV file:
Click Download a sample CSV file.
Open the downloaded CSV file.
Download the country codes and time zones samples for reference if
the country codes and time zones you require are not shown in the
downloaded sample.
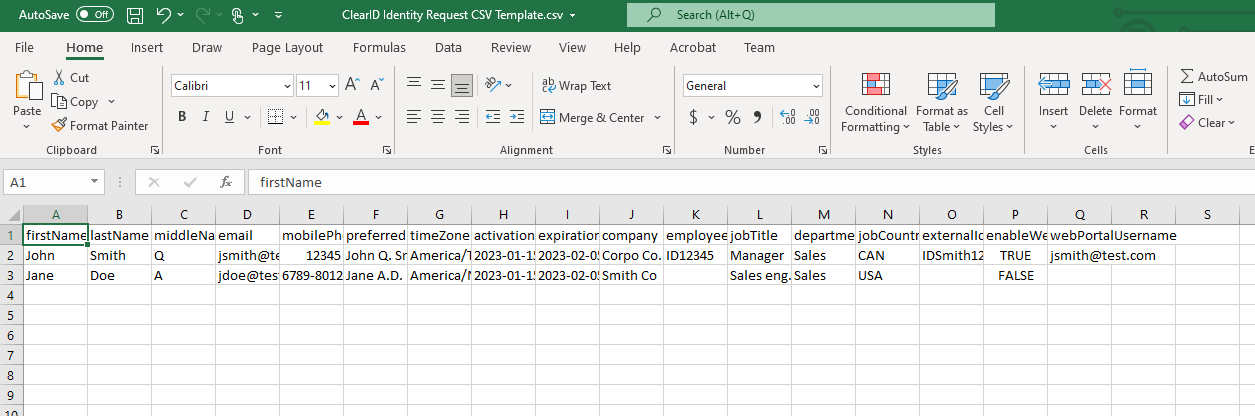
Complete a row of information for each identity.
The columns in the CSV template can vary depending on the settings in your site
configuration.
Save the file as a CSV.
In the Import identities dialog, drag and drop or browse to
select the file.
Click Import File.
Review the imported identities data and check for any errors and click
Next.
If any errors are encountered in the imported CSV file, they are highlighted in
red.
Any corrections must be applied in the CSV file and then imported again.
Correcting errors overwrites the imported data.
If the list of errors is long, you can use the Show errors
only slider.
(Optional) If your identities list is long, consider using the Show
errors only slider.
Click Next.
In the Review section, review the information to ensure that
everything is correct and click Finish.
Example
After you finish
Depending on the identity template that you selected, your identity requests are either
approved automatically or reviewed and approved (or rejected) by designated
approvers.

 in the navigation pane, or click the
New request button.
in the navigation pane, or click the
New request button.