To establish the rules, approval workflows, and required information for inviting
guests to a location, Site owners can configure planned and walk-in visits in Genetec
ClearID™.
Before you begin
Edit the visit type configurations for the visit profile.
What you should know
Genetec ClearID™ adds a default visit profile to all systems with visitor management
previously enabled for sites. This profile can't be deleted.
If you only need one visit profile, you can configure the default profile and update its
name.
Sites without configured visit profiles have visitor management disabled.
Sites must have at least one pre-authorized area to enable walk-in visits.
Procedure
Expand and configure the planned visit settings.
In the Invite permissions section, select who can invite
visitors to the site:
Select All identities can invite visitors to allow
everyone to invite visitors to this site.
Select Identities belonging to at least one of the following
categories to manage who can invite visitors to this site.
If you selected Identities belonging to at least one of the following
categories, configure who can invite visitors:
Select at least one:
Members of the following roles
Select the roles that can invite visitors.
When adding new role permissions,
role members should log off and back on to load the updated visitor invite
permissions.
Identities with this site as their primary site
Allow identities with this site as their primary site to invite visitors.
Identities who are owners of this site
Allow site owners to invite visitors.
Specify whether to Limit users to inviting guests to only areas that
user can access :
If selected, users can only invite guests to areas where they have access. This
setting is enforced when a guest visit request is created.
If cleared, users can invite guests to any area in ClearID that allows
visitors.
Select the Visit event approval workflow that you require:
No approval required
Supervisor approval required
Custom approvers
If you select Custom approvers, click Add
approvers and designate approvers for visit requests.
If an area is selected during the visit event creation, it can trigger its own approval
workflow.
In the Visitor instructions file section, configure an instruction
file:
Email communications with visitors automatically include this instruction file, which
can include location details, a site map, travel instructions, and so on.
Upload
Select a PDF file with visitor instructions. The system saves it as
VisitInstructionsFile.pdf.
VisitInstructionsFile.pdf
Download the current file. Before uploading a file, this button says No
PDF uploaded.
Remove
Stop sending the file in visitor emails.
In the Check-out section, select when to automatically check out
visitors.
If you choose the end of the day, the visitor is checked out at midnight on the last
day of the visit.
(Optional) Add a grace period between the end of the visit event and automatic
check-out.
Visitors' temporary access rights and QR code credential are deactivated during
automatic check-out. If a grace period is set, check-out happens after that period
ends.
(Optional) Add pre-defined options to visit event requests by completing the following
fields:
Parking locations
Host meetup locations
Reasons for visit
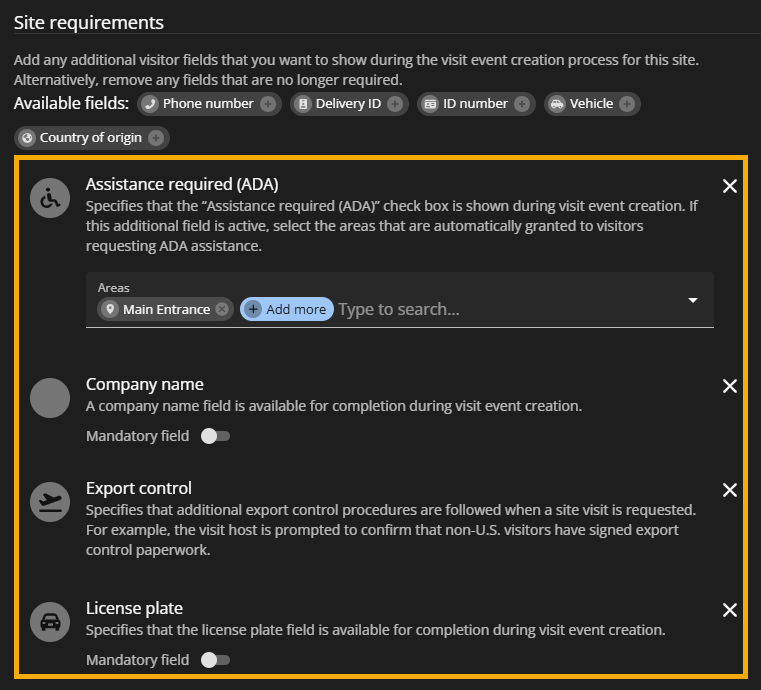
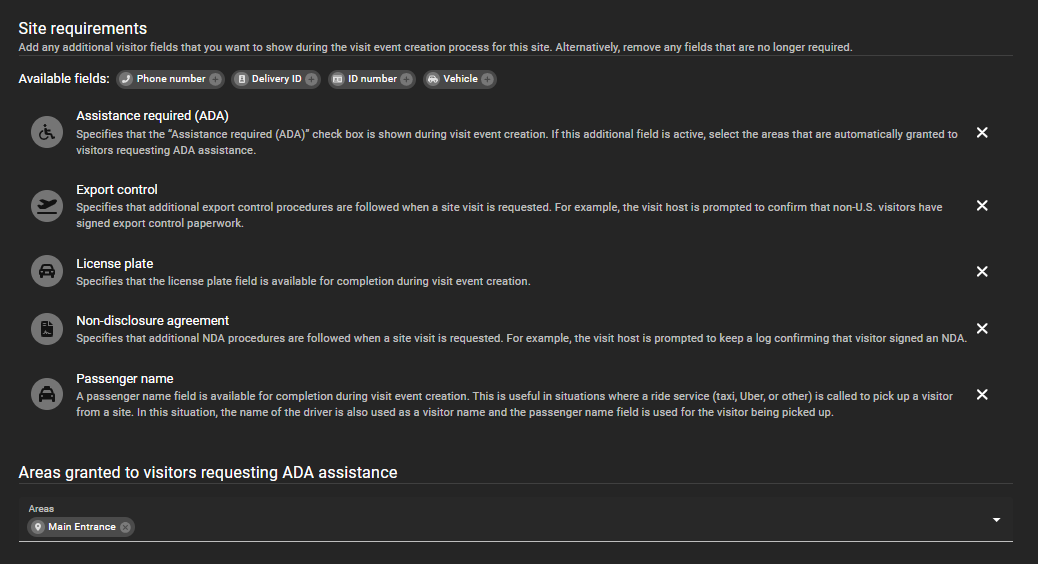
(Optional) In the Site requirements section, click to add visitor fields that you want to show during the visit creation
process.
The Available fields section shows the added fields.
If you added Assistance required (ADA) to your site
requirements, add areas that should automatically be granted to visitors requesting ADA
assistance.
For example, if a site has a wheelchair-accessible door, the site or facilities
manager must add that door to the area and include the area in the list of areas with ADA
assistance. When a visitor checks in with ADA enabled, ClearID grants access to that door.
Other visitors are not granted this access.
(Optional) Turn on Mandatory field to require that users fill in
the field when creating visit event requests.
Expand the walk-in visit settings and enter a display name for the visit profile.
The name is displayed to visitors on the Self-Service Kiosk.
Click save.
After you finish
You can now configure general visit profile settings, such as check-in, badges, access
control, and compliance documents.

 to add visitor fields that you want to show during the visit creation
process.
to add visitor fields that you want to show during the visit creation
process.
 The Available fields section shows the added fields.