Creating custom identity fields
2025-07-21Last updated
To collect and store additional information about identities in the Genetec ClearID™ web portal, Account administrators can create custom fields and set them to synchronize with Security Center as needed.
Before you begin
What you should know
Procedure
- In the ClearID portal, click Administration > Custom fields .
-
Create a custom field section.
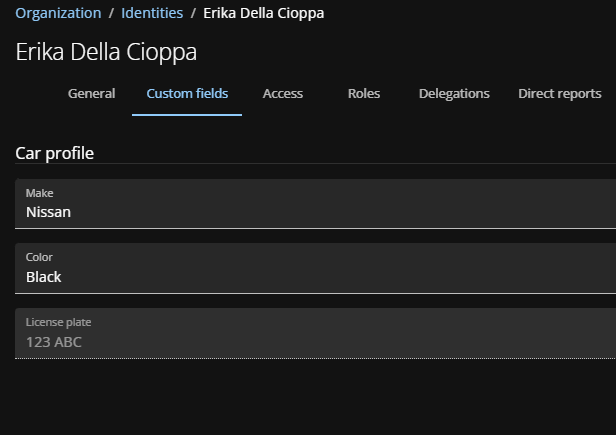
Custom field sections group related custom fields together to be displayed on identity profile pages.
- Click Add custom field section.
-
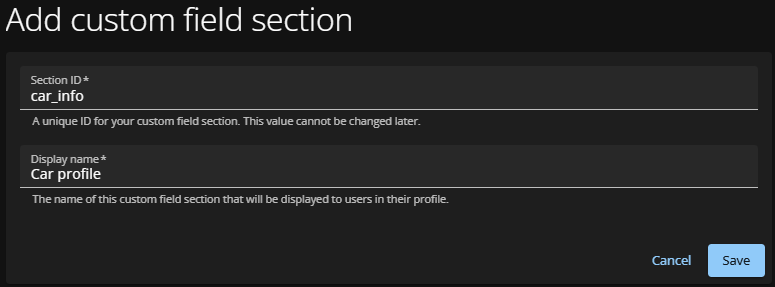
On the New custom field section page, fill out the necessary
fields.
- Section ID
- In the Section ID field, enter a unique ID for your custom field section.
-
Important:The section ID is used for organization and troubleshooting purposes. This value cannot be changed later.
- Display name
- In the Display name field, enter a name for the custom field section. The name is displayed on identity profile pages.
- Click Save.
-
(Optional) Click
to edit a custom field section.
-
On the new page, edit the custom field section as needed:
- Display name
- Edit the selected section's display name.
- Custom fields
- Add, view, or edit custom fields within the selected custom field section.
- Delete custom field section
- Delete the selected custom field section.
- Click Save.
-
On the new page, edit the custom field section as needed:
-
Add custom fields to the custom field section.
-
Click
to edit the custom field section.
- Click Add custom field.
-
Configure the custom field as needed:
- Custom field ID
- In the Custom field ID field, enter a unique ID for the custom field.
- Display name
- In the Display name field, enter a name for the custom field.
- Custom field data type
- In the Custom field data type section, select the data type for the information displayed in the custom field.
- Read-only
- In the Read-only section, choose whether to restrict users and administrators from editing the custom field on the identity profile page.
-
Note:The read-only feature is intended to be used when synchronizing ClearID with an external source.
- Synchronize custom field values with external systems
- In the Synchronize custom field values with external systems section, choose whether to synchronize the custom field with Security Center.
- Click Save.
-
Click
-
(Optional) Create a custom field that will not be displayed on the identity profile
page.
Note:These custom fields will still synchronize with Security Center if Synchronize custom field values with external systems is selected.
- In the ClearID portal, click Administration > Custom fields .
- Click Add custom field.
- Repeat step 4 c.
- Click Save.
