Granting additional permissions for identities and roles

2022-11-25Last updated

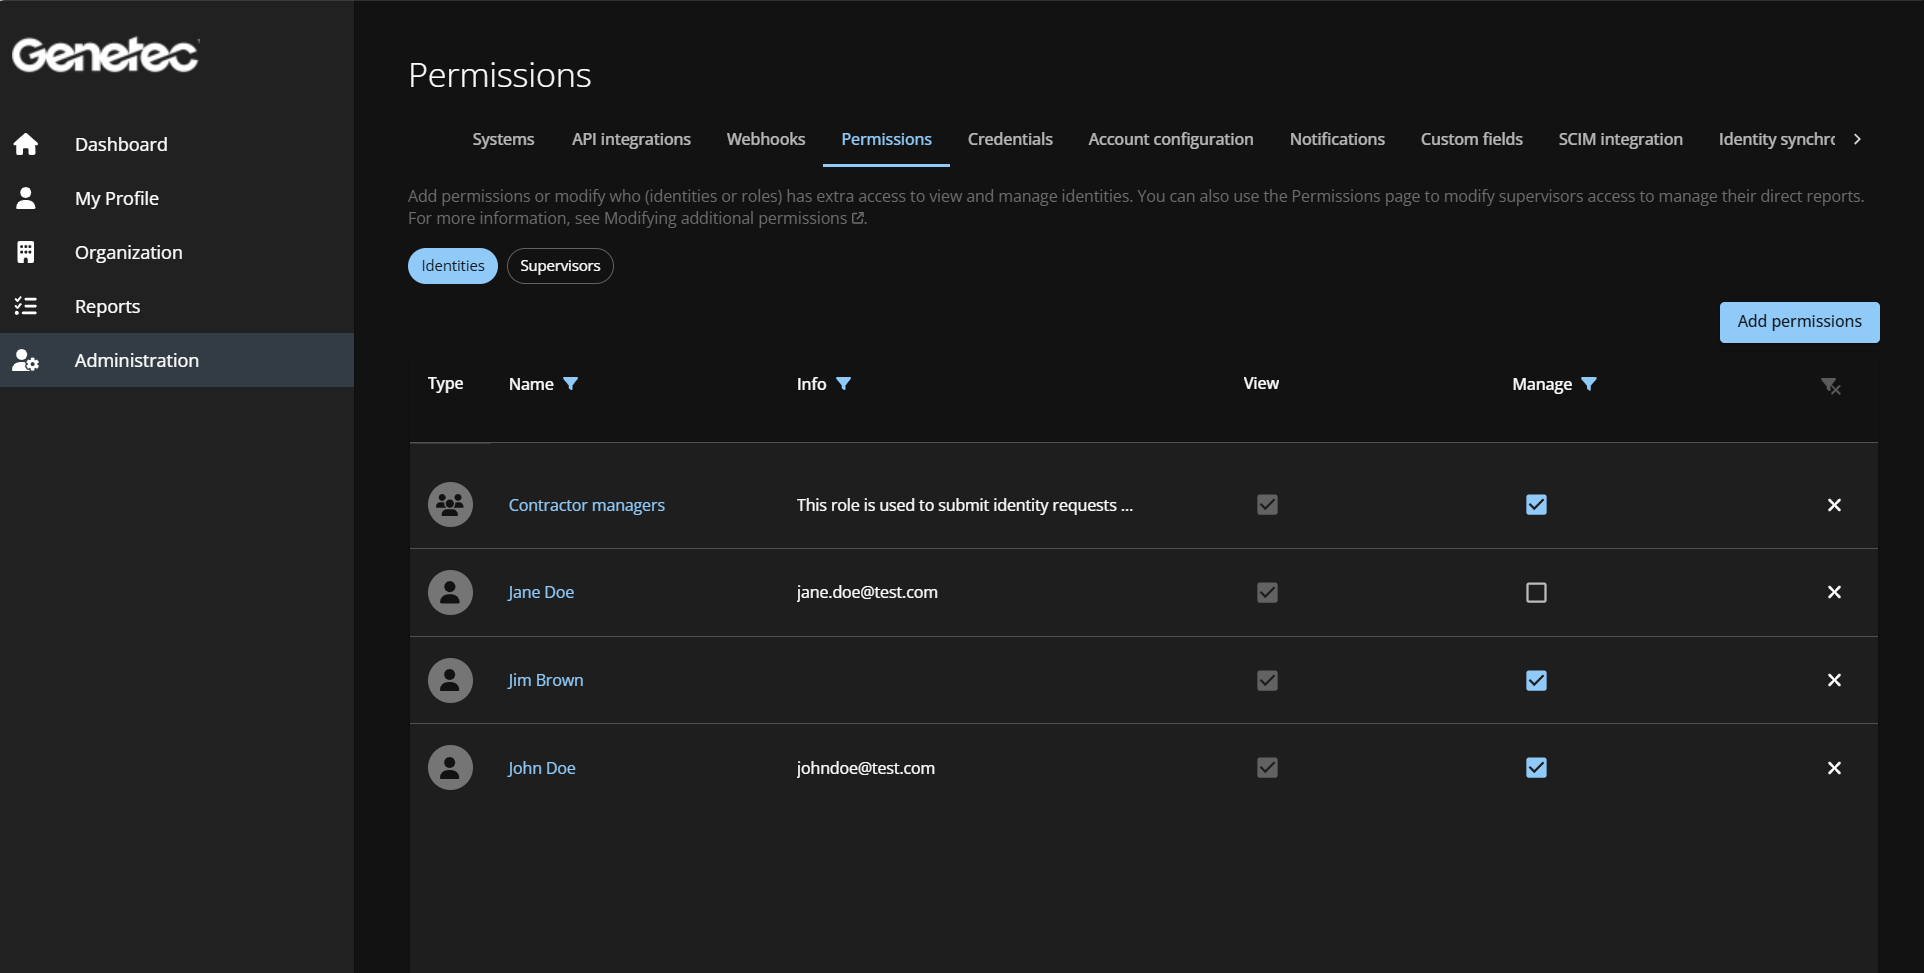
Some organizations require more access than the default permissions provided for a Genetec ClearID™ user. You can grant identities and roles additional permissions so that they can view or manage all identities in the system.

What you should know

Only an account administrator can add identity and role permissions.

Procedure

  1. From the Home page, click Administration > Permissions .
    Permissions page in ClearID showing a role and several identities with extra read and write permissions.
  2. Click Add permissions.
    Permissions dialog in ClearID with the identities tab selected showing the identities field, permissions check boxes, and the reason field.
  3. In the Permissions dialog, select either Identities or Roles to add the permissions you require.
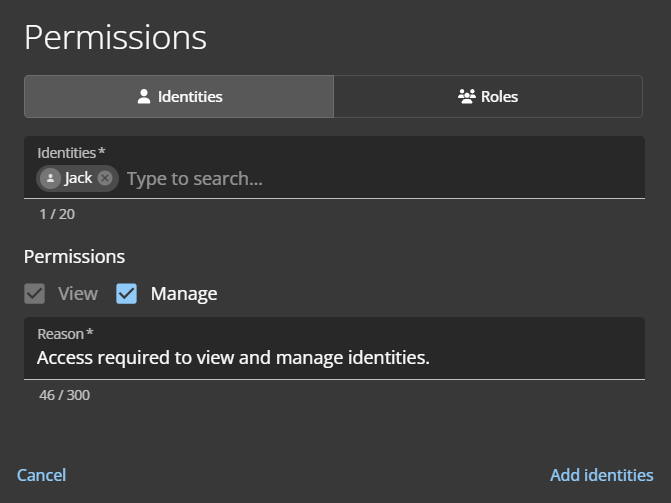
  4. If you selected Identities, complete the following:
    1. In the Identities field, enter one or more identities that you want to grant extra access.
      A maximum of 20 identities per request is supported.
    2. In the Permissions section, select the permissions you want to add to the identities selected earlier.
      Read
      Read access to view identities is granted by default.
      Write
      Select the Write check box to add permissions to modify identities.
      Note: If you make updates to identities that are synchronized with an external data source, the synchronization can overwrite your write permission changes. Write permissions are useful for identities being manually entered into ClearID.
    3. In the Reason field, enter a reason why the access was added.
      Permissions dialog in ClearID with the identities tab selected and fields completed.
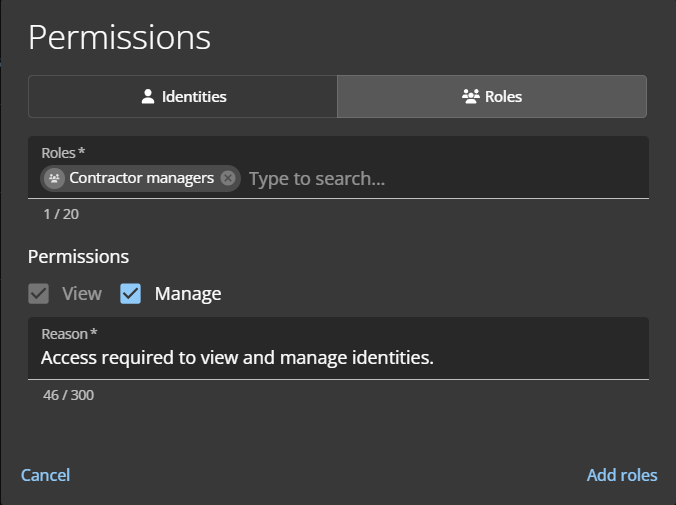
  5. If you selected Roles, complete the following:
    1. In the Roles field, enter one or more roles that you want to grant extra access.
      A maximum of 20 roles is supported.
    2. In the Permissions section, select the permissions you want to add to the roles selected earlier.
      Read
      Read access to view identities is granted by default.
      Write
      Select the Write check box to add permissions to modify identities.
    3. In the Reason field, enter a reason why the access was added.
      Permissions dialog in ClearID with the roles tab selected and fields completed.
  6. Click Finish to submit your changes.
The specified identities or roles now have the required permissions to view and manage identities.

After you finish

View identities or Modify identities.