Inviting visitors manually

2026-02-12Last updated

If you have five or fewer visitors to invite to your event, you can add your visitors manually.

Before you begin

  1. Familiarize yourself with workflows.
  2. Enable visitor management for your site.
  3. Ensure that you have the required permissions to invite visitors to the site.

What you should know

  • If your identity home site is configured, you can invite visitors to that site if visitor management settings allow it.
  • The options displayed when inviting visitors can vary depending on the site and visitor management settings.

Procedure

  1. Log on to the self-service portal.
  2. Select a method to invite visitors:
    • Click Dashboard > My requests > New request > Invite visitors .
    • Click Dashboard > Visits > New visit event .
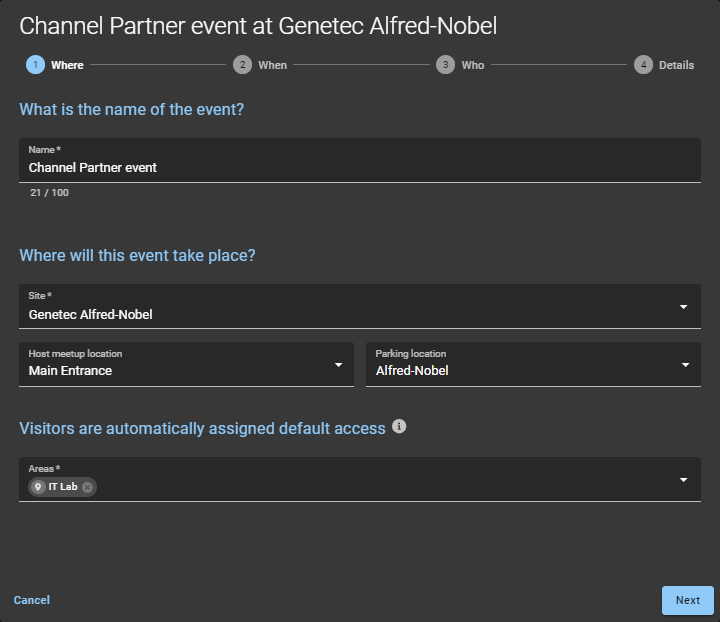
  3. In the New visit event wizard, specify where the event will take place.
    Visit event wizard in Genetec ClearID™ showing the name of the visit event, where it will take place and any default access.
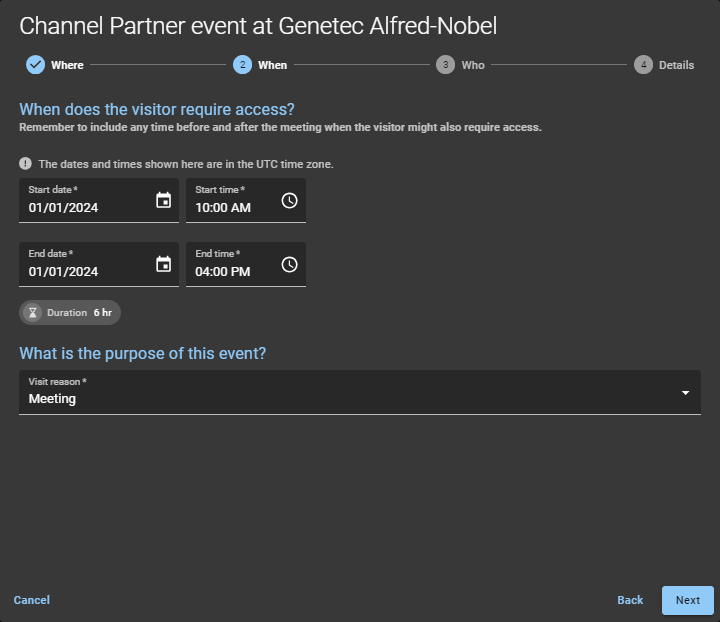
  4. Specify when the event takes place and the purpose of the event.
    Visit event wizard in ClearID showing when the visitor requires access and the purpose of the visit.
    Tip:
    Include extra time before and after the meeting if visitors need extended access.
  5. Specify who to invite to the event.
    Visit event wizard in ClearID showing a list of invited visitors.
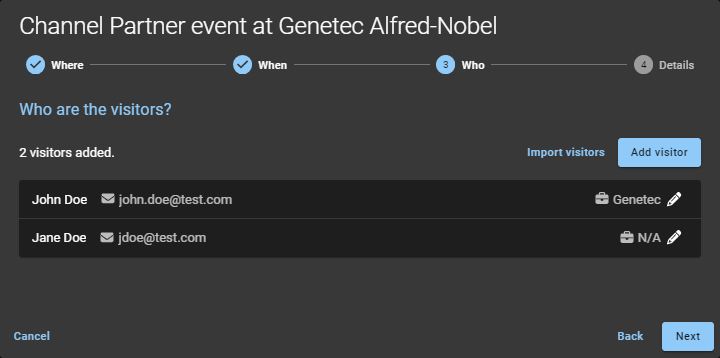
    1. Click Add visitor and complete the fields.
    2. Click Save.
    3. Repeat for each additional visitor.
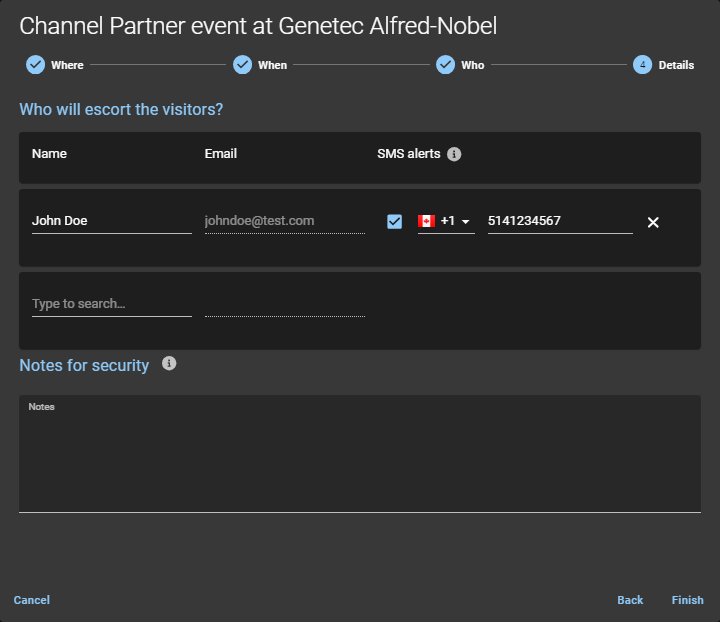
  6. Complete the event details.
    Visit event wizard in ClearID showing the details section including visitor hosts and notes for security.
    1. Enter the name and email of the visitor event host.
      You can search to add up to 10 visitor hosts.
    2. (Optional) Enter a mobile phone number to send SMS alert notifications to visitor hosts when the visitor checks in.
    3. (Optional) Add notes about the visitor, the visit invite, or the visit event.
  7. Click Finish.
Your visit request is submitted and awaits approval.

Example

After you finish

Confirm whether the request was approved or rejected:
  • Check your email for a Visit approved email.
  • Check My requests in ClearID.