Click My workspace
> Requests
> New request
> Invite visitors.
Click My workspace
> Visits
> New visit event.
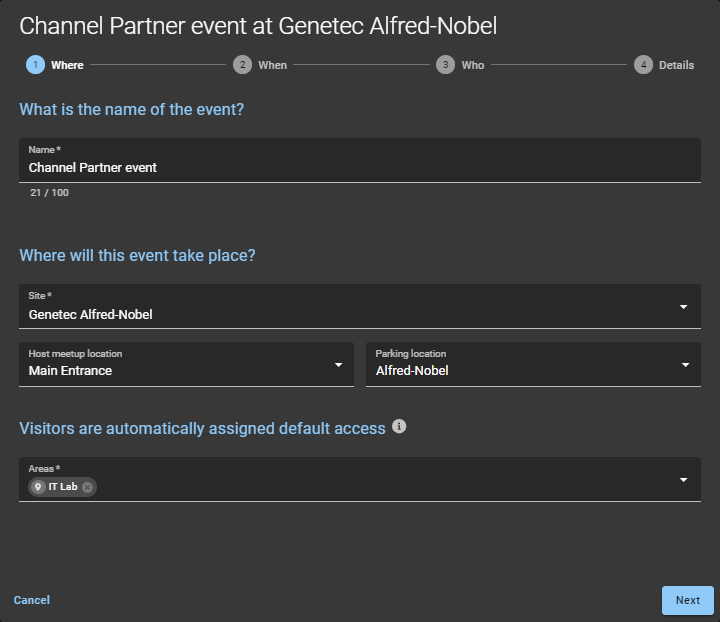
In the New visit event wizard, specify where the event will
take place.
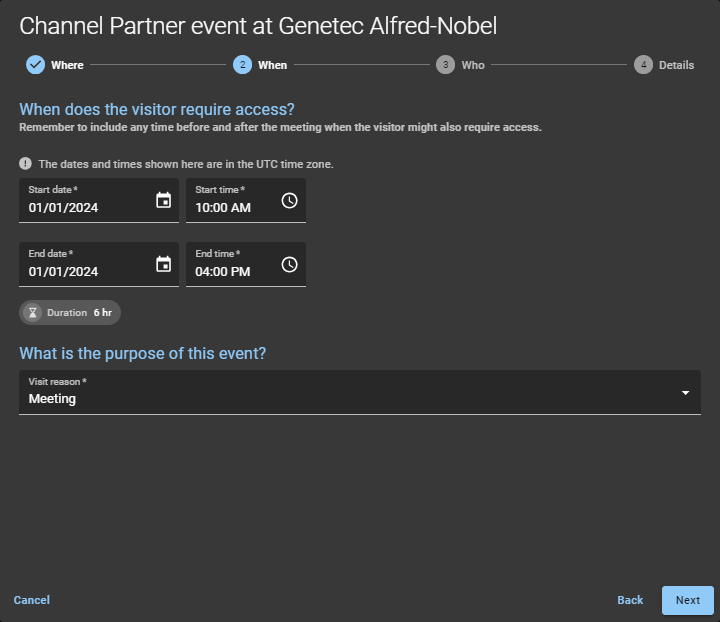
Specify when the event will take place and the purpose of the event.
Include extra time before and after the meeting if visitors need extended
access.
Prepare to import who you want to invite to the event.
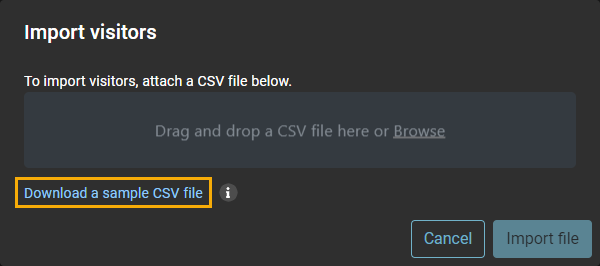
Click Import visitors.
Choose one of the following:
Use an existing CSV file.
Download a sample CSV file.
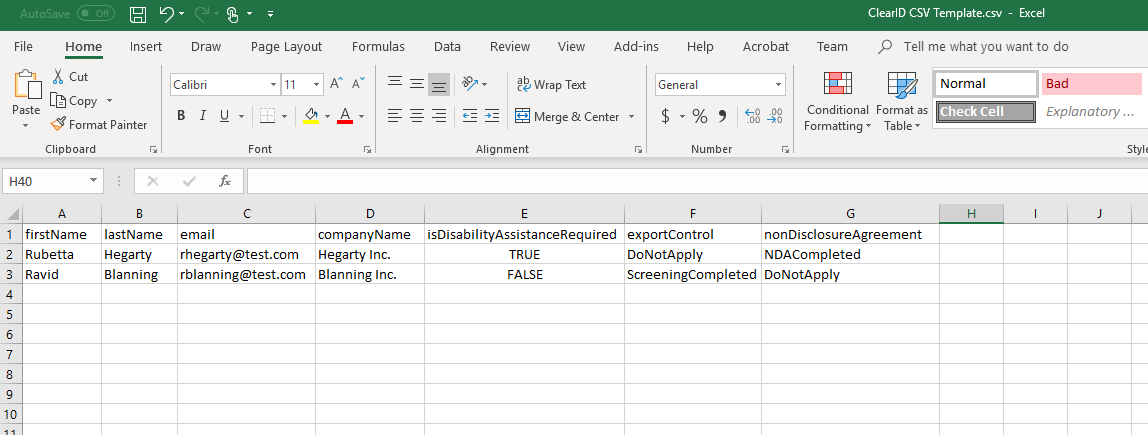
When you import visitors, you can start with a sample CSV file provided by the
system. The columns in the sample CSV file match the settings in the site
configuration. You can then complete the visitor details values in the CSV file and
import all visitors in one click. For example, importing 500 people to a site visit
or customer event.
If you use an existing CSV file:
Drag and drop the file, or click Browse to select it.
Click Import file.
Click Confirm to complete the import.
(Optional) Click Edit () to modify any visitor details and click
Save.
If you download a sample CSV file:
Click Download a sample CSV file.
Open the downloaded CSV file.
For each visitor, complete a row of visitor information.
The columns in the CSV template can vary depending on the settings in your
site configuration.
Save the file as CSV.
Return to the Import visitors dialog, and drag and drop the
file or click Browse to select it.
Click Import File and click
Confirm.
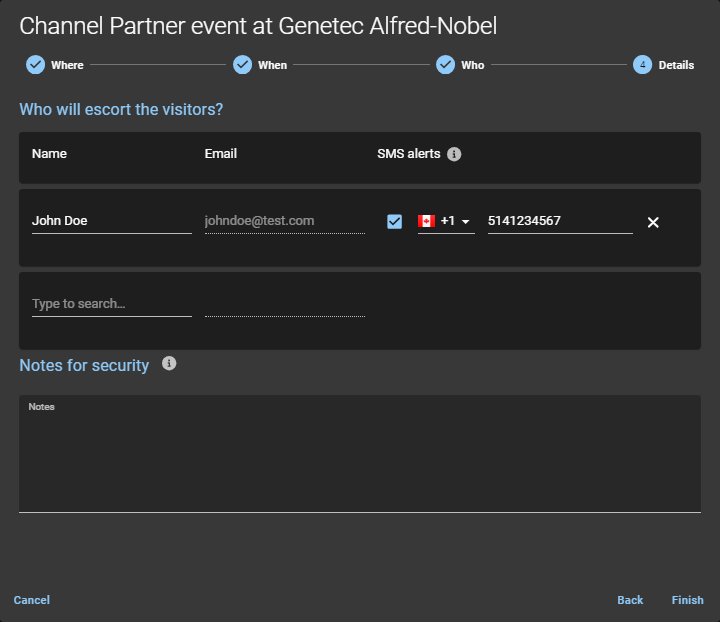
Complete the event details.
Enter the name and email of the visitor event host.
You can search to add up to 10 visitor hosts.
(Optional) Enter a mobile phone number to send SMS alert notifications to visitor
hosts when the visitor checks in.
(Optional) Add notes about the visitor, the visit invite, or the visit event.
Click Finish.
Your visit request is submitted and awaits approval.
After you finish
Confirm whether the request was approved or rejected:


 ) to modify any visitor details and click
Save.
) to modify any visitor details and click
Save.