Adding PDF acknowledgment documents to the Self-Service
Kiosk
2025-02-18Last updated
For sites with special requirements, Account administrators and Site
ownerscan upload documents like non-disclosure agreements, waivers, and more for visitors
to sign when checking in using the Self-Service Kiosk.
You must be an Account administrator or Site ownerto add documents for
visitors to acknowledge to the Self-Service Kiosk.
You can display up to five documents on the kiosk during check-in.
Procedure
In the Genetec ClearID™ web portal, click Organization
> Site
> Visitor management
> Documents.
Click Add kiosk document.
Important: These documents must be in PDF format.
In the Display name field, enter a name for the
document.
Drag and drop a file into the field, or click Browse to
search for a file.
Configure your sharing preferences for the document as needed:
Select the Show document on the kiosk checkbox to show the
document on the Kiosk during visitor check-in.
Tip: When the checkbox is not selected, the document
remains available in draft mode.
Select the Show document in visit event confirmation e-mail
checkbox to attach a copy of the document to visitor confirmation emails so that
visitors can review the documents before they arrive.
Add a list of recipients who should receive a copy of the document once visitors
acknowledge it.
Note: You can click to copy the complete list of recipients,
for example, to add the same recipients to other acknowledgment documents.
Click Add kiosk document to save your document.
Use the icons to manage each uploaded document:
Click to
modify an existing document.
Click to
download a local copy of the document.
Click to
remove a document.
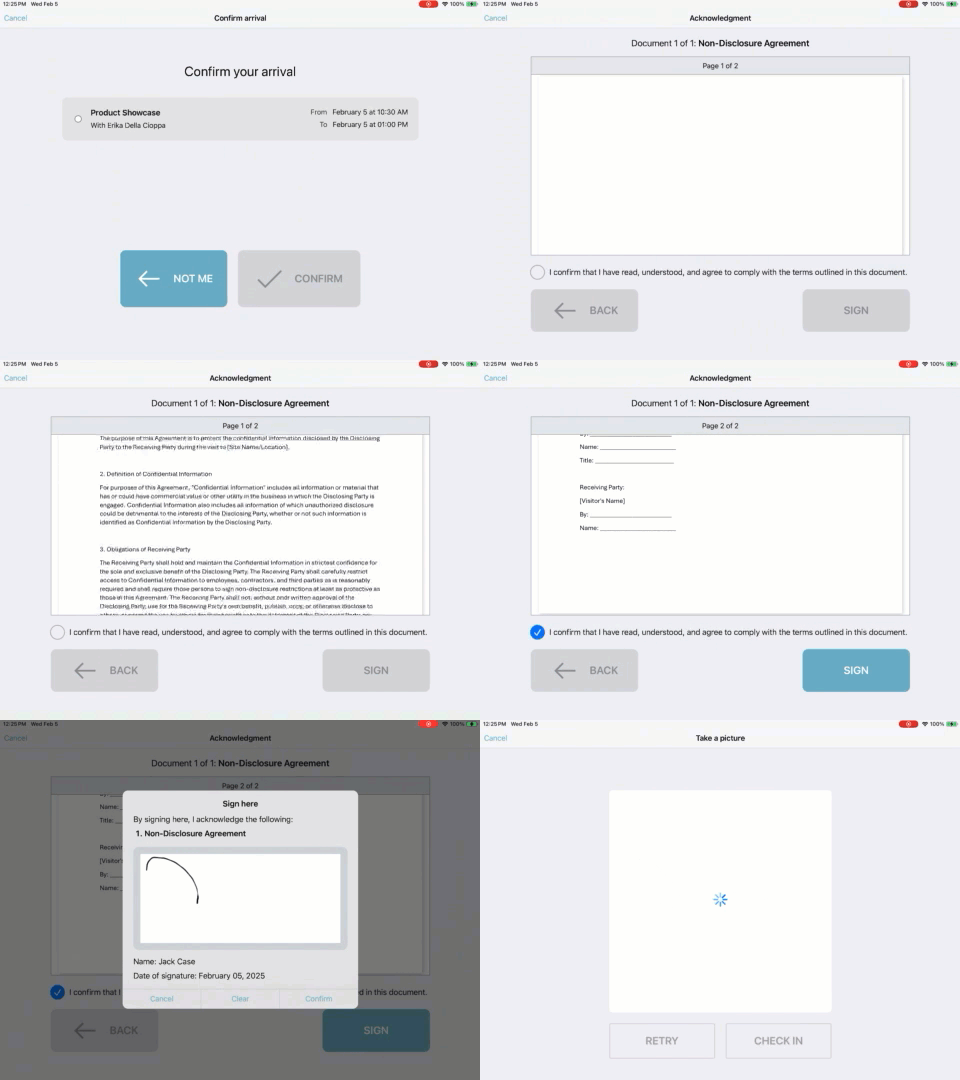
Visitors have to confirm they have read any uploaded documents
and sign them during check-in at the Self-Service Kiosk.