Configuring the Self-Service Kiosk label printer for Bluetooth mode (Brother QL-820NWBc or QL-820NWB)

2026-01-28Last updated

Before visitors can use the Genetec ClearID™ Self-Service Kiosk to check in, you must configure the label printer so that labels can be printed during the check-in process.

Before you begin

Familiarize yourself with the following:
Brother QL-820NWB label printer.
Note:
The Brother QL-820NWBc replaced the Brother QL-820NWB printer (discontinued). For more information about the differences, see Brother QL-820NWBc Specifications changes.

What you should know

When using the Brother QL-820NWBc or QL-820NWB label printer in Bluetooth printing mode, the following applies:
  • Each label printer can be paired with only one kiosk.
  • The label printer must be within 30ft of the kiosk.
Note:
A rechargeable Li-ion battery unit (power supply) can also be purchased and used in situations where mains power is unavailable.

Procedure

  1. Plug printer AC adapter into a power outlet and connect the power lead to the label printer.
    Figure 1. Brother QL-820NWBc label printer (rear)
    Rear of the Brother QL-820NWBc label printer with the AC adapter port highlighted.
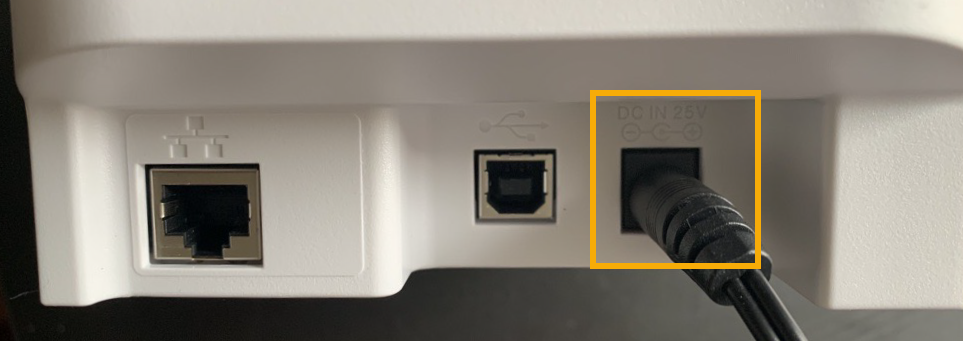
    Figure 2. Brother QL-820NWB label printer (rear)
    Rear of the Brother QL-820NWB label printer with the AC adapter port highlighted.
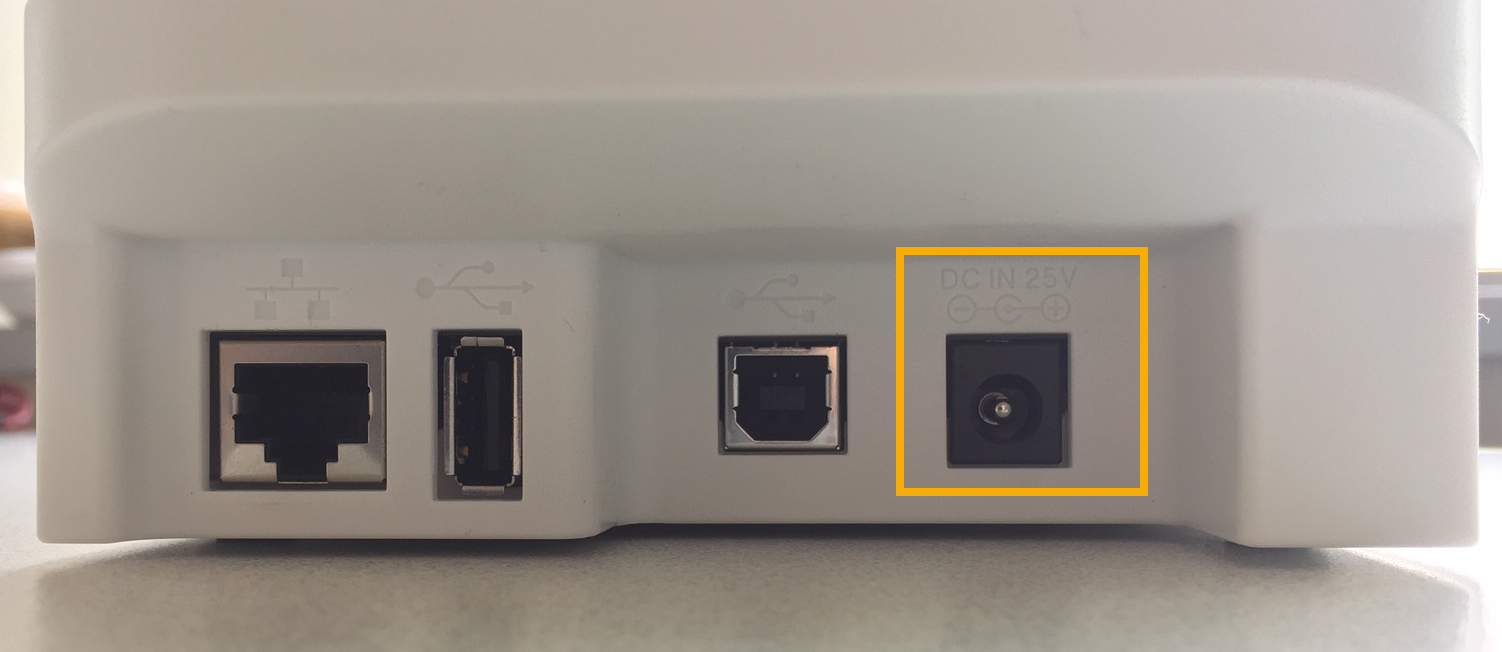
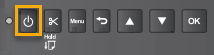
  2. Press the Power button to turn the label printer on.
    Brother QL-820NWB label printer LCD display controls with the power button highlighted.
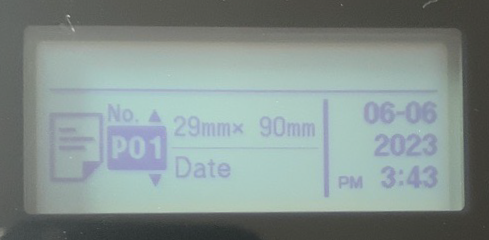
  3. (Optional) If you see Template Mode menu and the incorrect label size displayed, disable it.
    Brother QL-820NWBc label printer LCD display showing the Template mode menu and label size.
  4. Use the arrow buttons to navigate the label printer menu.
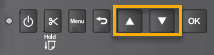
    Brother QL-820NWB label printer LCD display controls with the up and down menu navigation buttons highlighted.
    1. Select Bluetooth > Bluetooth (On/Off) > On in the settings menu and press OK.
    2. Select Bluetooth > Automatic Reconnection (On/Off) > On in the settings menu and press OK.
  5. Pair your Bluetooth label printer with your ClearID Self-Service Kiosk iPad.
    1. In the Self-Service Kiosk mobile app, tap Settings ().
    2. In the Printing section, tap Bluetooth.
      Settings page in the Self-Service Kiosk mobile app with the Bluetooth option selected.
  6. On your iPad, navigate to the Apple Settings icon, tap Settings > Bluetooth .
    1. (Optional) If Bluetooth is disabled, tap the slider to enable Bluetooth.
      Apple iPad settings page with the Bluetooth settings selected.
    2. Select the correct printer to pair the ClearID Self-Service Kiosk iPad with your printer.
  7. In the Self-Service Kiosk mobile app, tap Settings ().
    Settings page in the Self-Service Kiosk mobile app with the Bluetooth option selected and showing a printer paired with the device.
    1. In the Printing section, check that your Brother QL-820NWBc or QL-820NWB printer is displayed.
      Tip:
      If the printer is not displayed or Bluetooth is not selected, tap Wi-Fi then tap Bluetooth to trigger discovery again.