2026-09-03Last updated
To define how group data flows between Okta and Genetec
ClearID™, you must add your group
configuration settings.
Before you begin
Ensure you have already added a synchronization configuration and configured the
connection.
What you should know
You must be an Account administrator to edit Okta group configuration
settings.
Procedure
-
From the Access management section on the sidebar, click .
-
Select the Okta configuration you want to configure.
-
In the Group configuration section, click
Configure.
-
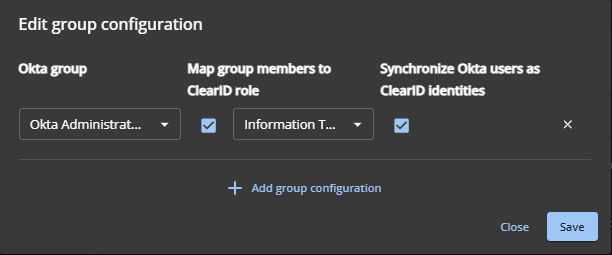
In the Edit group configuration dialog edit the settings:
-
Click Add group configuration to add a row.
-
Under Okta Group, select the group to synchronize.
-
(Optional) Under Map group members to ClearID role, check the
box and select a role to assign group members to.
This option maps group members to a role, but does not sync identity
details.
-
(Optional) Under Synchronize Okta users as ClearID identities,
check the box to create or update corresponding ClearID identities.
This option may create new identities if they don’t already exist.
-
Click Save.
After you finish
Define how individual user data flows into the system. This ensures the correct profile
attributes are imported for each person.