Setting up the Cloud CSV local agent
2026-04-28Last updated
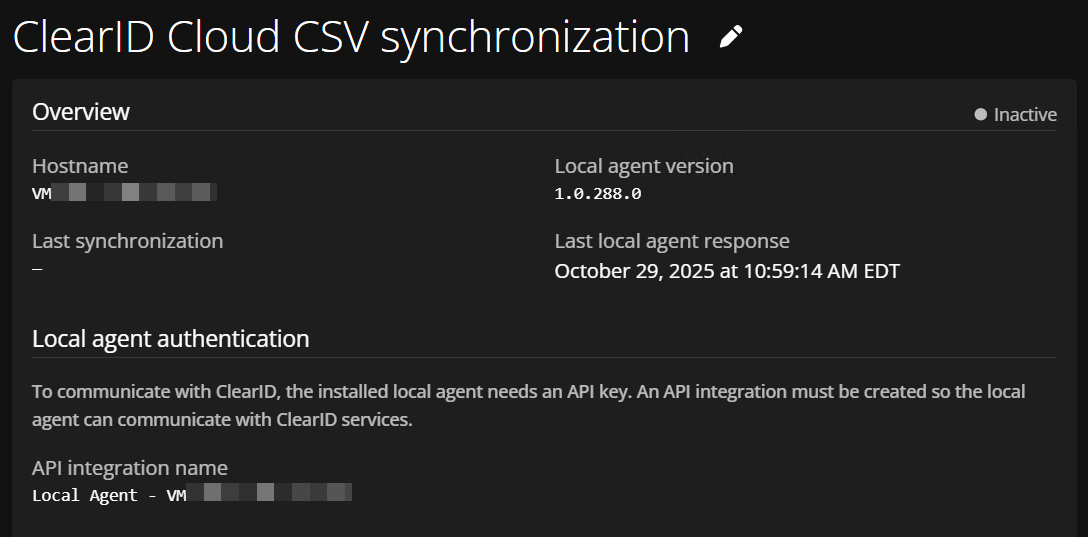
To synchronize data between CSV files and Genetec ClearID, Account administrators must install the Genetec ClearID Local Agent. The local agent creates an API integration that monitors your CSV file for changes in identity information.
Before you begin
What you should know
- The latest .NET Framework is required to run Genetec ClearID Local Agent.
- The local agent is a service that runs on local port 9000.
- The local agent cannot run if a service is already running on local port 9000.
- The ClearID portal must be opened in a browser running on the same machine where the CSV files and local agent reside.
Procedure
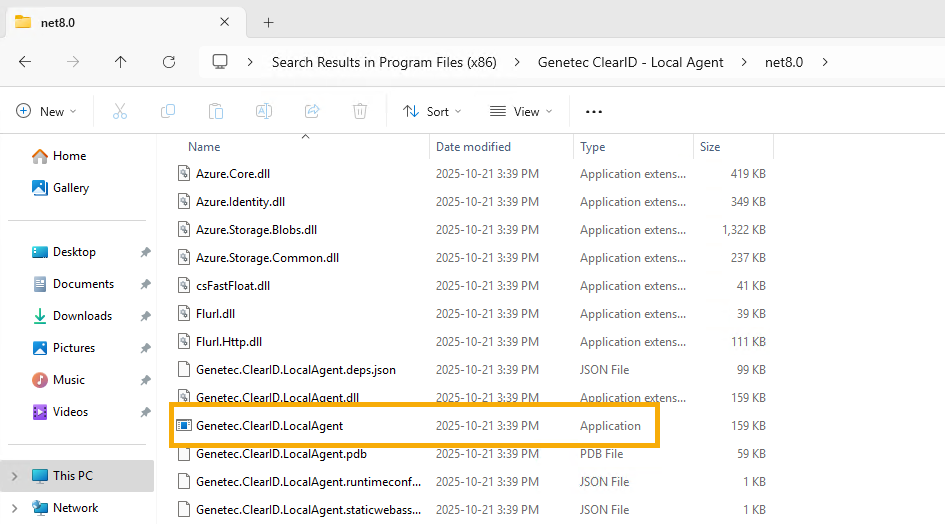
-
Right click Genetec.ClearID.LocalAgent.exe and click
Run as administrator.
Running the local agent creates an API integration with the ClearID portal. When the integration is established, the local agent can continuously monitor your CSV file for changes and synchronize those changes with ClearID.