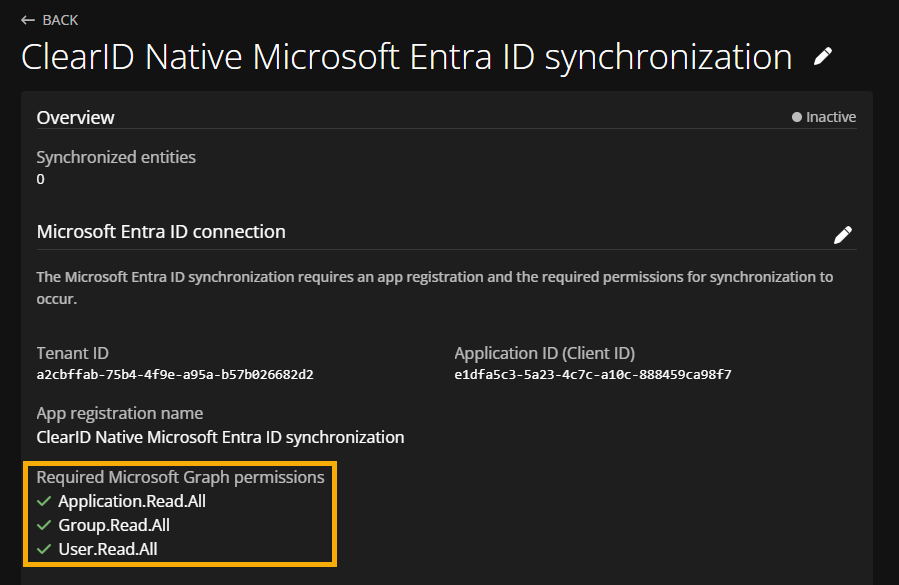
Configuring the Microsoft Entra ID connection
2026-05-06Last updated
To enable identity synchronization between Microsoft Entra ID and Genetec ClearID™, Account administrators and IT security personnel must first register an application in the Microsoft Azure portal to obtain connection credentials.
Before you begin
Procedure
-
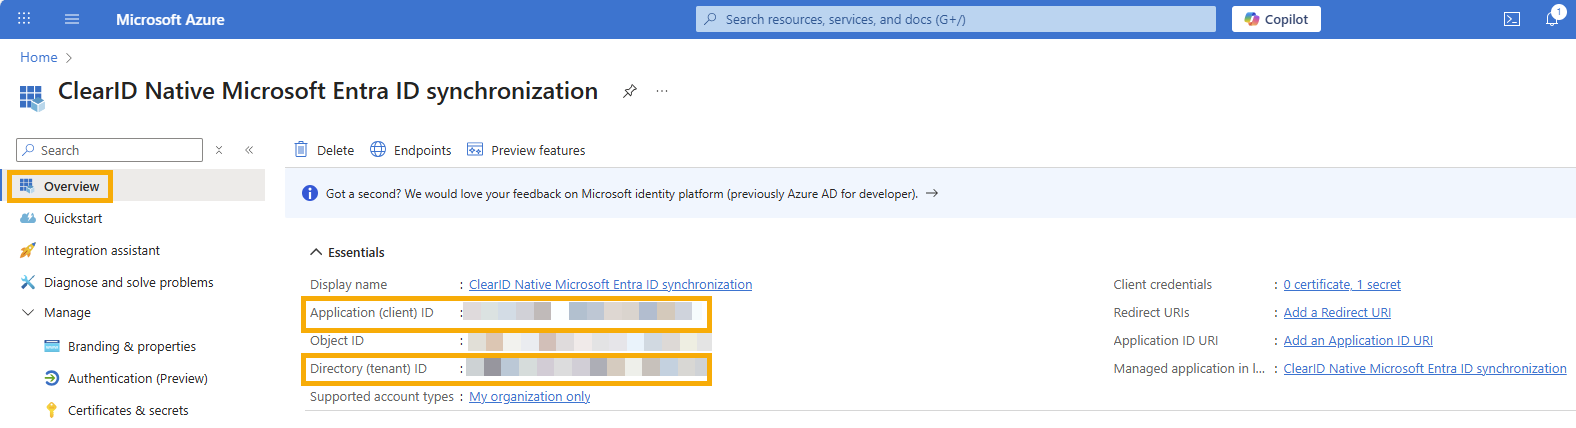
Access https://portal.azure.com/ and
navigate to you Microsoft Entra ID enterprise application.
-
On the Overview page, retrieve the Directory
(tenant) ID and Application (client) ID of your
application.
-
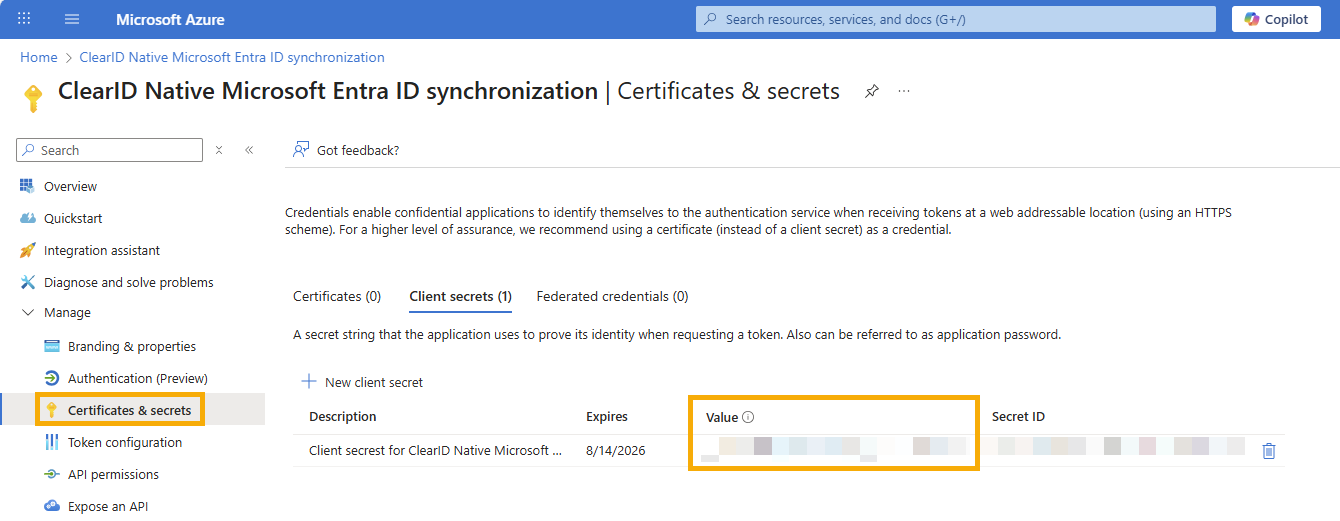
On the Certificates & secrets page, retrieve the
Client secret value of your application.
-
On the Overview page, retrieve the Directory
(tenant) ID and Application (client) ID of your
application.
- In the ClearID web portal, click .
- Select the Microsoft Entra ID configuration you want to configure from the list.
- On the new page, click Configure.
- In the Microsoft Entra ID connection settings window, enter the Directory (tenant) ID, Application (client) ID, and Client secret value recorded in step 1.
- Click Save.