2024-12-12Last updated
To determine what identity data is synchronized to Genetec ClearID™, you must select
the required synchronization settings and activate provisioning in Microsoft Azure.
What you should know
This procedure is for the ClearID deployment team, your IT
department, or the people responsible for administering Microsoft Entra ID in your
organization.
Procedure
-
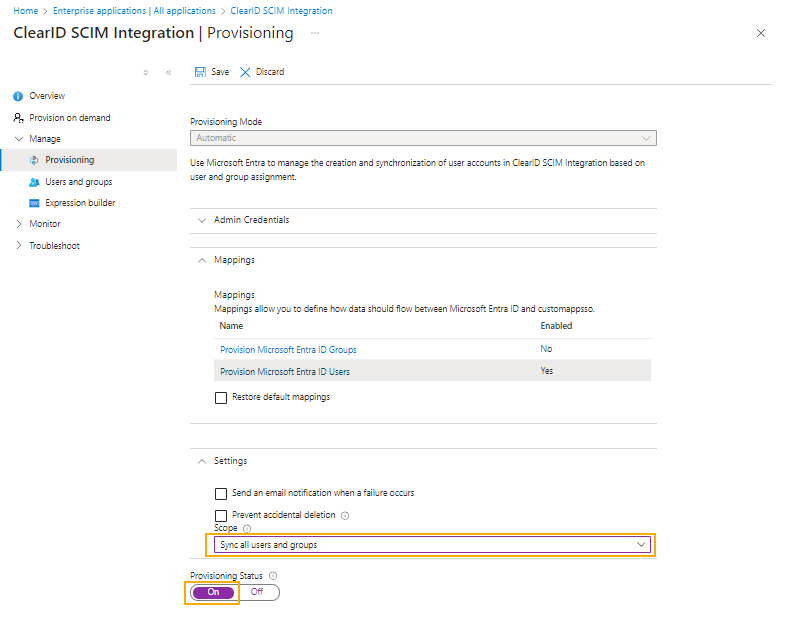
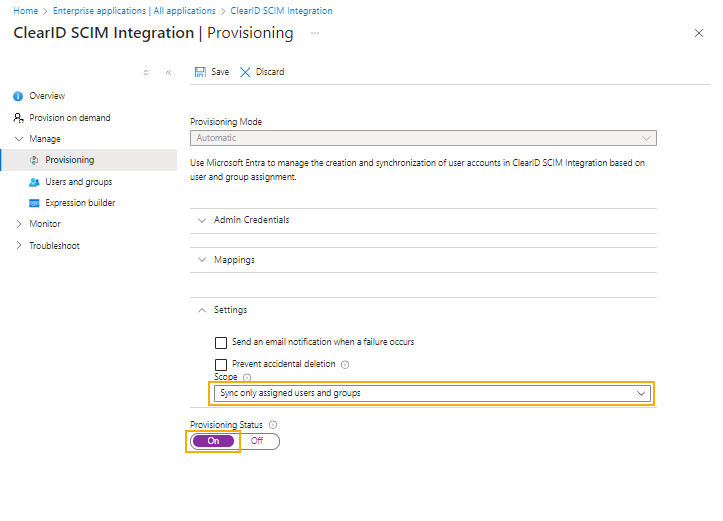
On the Provisioning page, click Settings
and choose which users to synchronize to ClearID:
- Sync all users and groups
- Synchronizes everything in Microsoft Entra ID.
- Sync only assigned users and groups
- Only selected users and groups are synchronized.
Important: ClearID doesn’t support group
synchronization. Depending on the provisioning settings that you select, either all
users identity data or only selected users identity data is synchronized.
-
If you chose Sync all users and groups, in the
Provisioning status section, move the slider to
On and click Save.
-
If you chose Sync only assigned users and groups, complete the
provisioning settings.
-
Click Users and groups in the left navigation bar.
-
Click Add group.
-
Click None selected, search for and select the group you
want to add, and click Select.
-
Click Assign and repeat for each group that you want to
add.
-
Return to the Provisioning page and click
Settings.
-
In the Provisioning status section, move the slider to
On and click Save.


