2026-08-14Last updated
To synchronize identity attributes using the SCIM integration, you must provide
connection credentials in Microsoft Entra ID.
What you should know
This procedure is for the ClearID deployment team, your IT
department, or the people responsible for administering Microsoft Entra ID in your
organization.
Procedure
-
In the Microsoft Entra ID portal, find and click Enterprise
applications.
-
In the Enterprise applications section, search for and select your
ClearID SCIM integration application.
-
In the Manage section, click Provisioning,
then click Provisioning again.
-
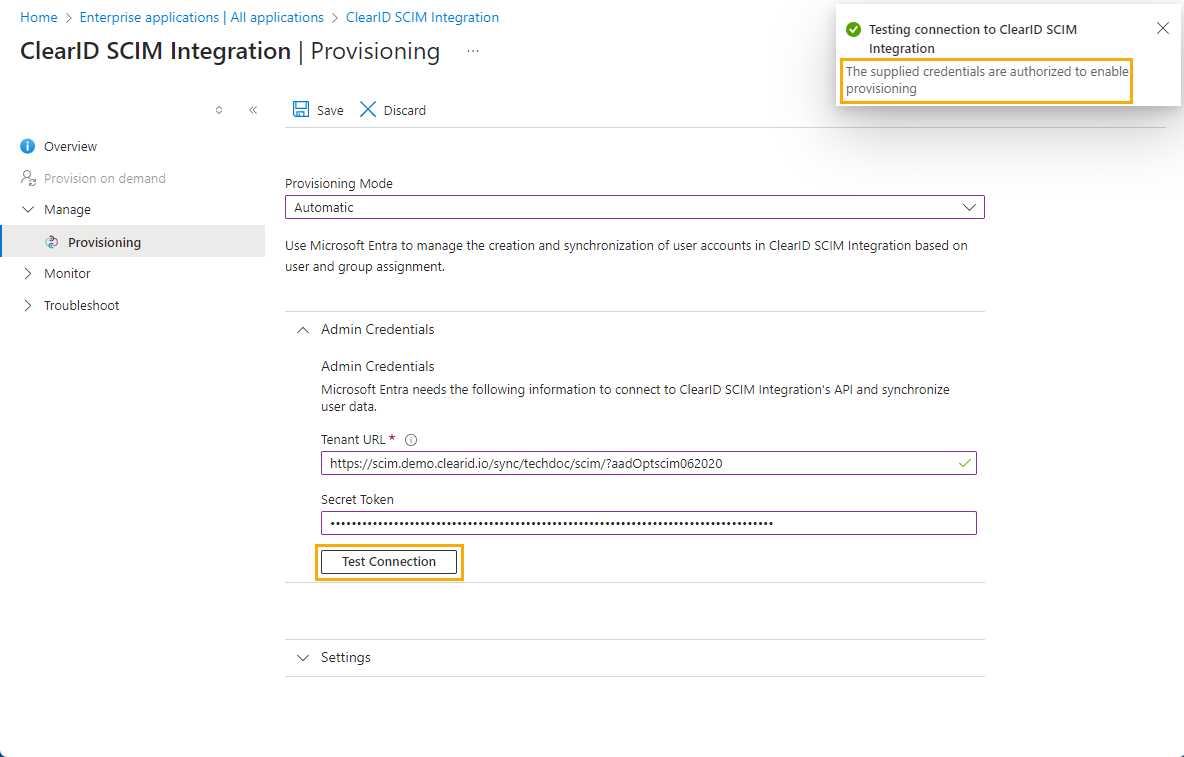
From the Provisioning Mode list, select
Automatic and expand the Admin Credentials
section.
-
In the ClearID portal SCIM integration tab, locate the
Endpoint URL section and click Copy to
clipboard next to the Microsoft Entra ID identity provider.
-
Return to the Microsoft Entra ID Provisioning page and paste into
the Tenant URL.
The endpoint URL is used to connect ClearID to SCIM authentication systems and
Microsoft Entra ID.
-
In the ClearID portal SCIM integration tab, locate the
Generate key section and click Copy to
clipboard.
-
Return to the Microsoft Entra ID Provisioning page and paste into
the Secret Token field.
The SCIM key is used to authenticate your application with Entra ID.
-
Click Test Connection.
-
Click Save.
Watch for a successful update notification in the upper right of the screen.
After you finish
Configure Microsoft Entra ID to only send supported data types
by explicitly disabling the default group synchronization setting.