To define how identity data flows between Microsoft Entra ID and Genetec ClearID™, you
must configure your user settings and map attributes for automatic synchronization.
This procedure is for the ClearID deployment team, your IT
department, or the people responsible for administering Microsoft Entra ID in your
organization.
Procedure
In the Microsoft Azure portal, search for and click Enterprise
applications.
In the Enterprise applications section, search for and select your
ClearID SCIM integration application.
In the Manage section, click Provisioning
and then click Provisioning again.
Expand the Mappings section and click Provision
Microsoft Entra ID Users.
Modify the default attribute
mappings.
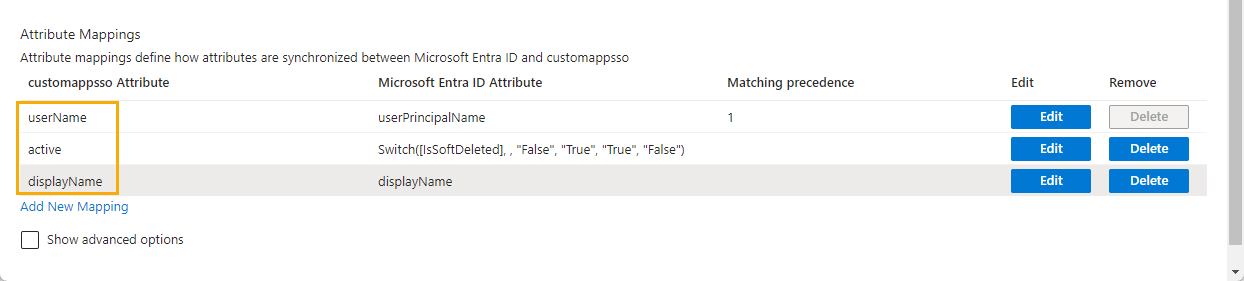
On the Attribute Mapping page, click
Delete to remove unused default attributes.
Only keep the following:
userName
active
displayName
Click Save and then click Yes to
confirm your
changes.
Modify the customappsso user attributes.
On the Attribute Mapping page, click Show advanced
options.
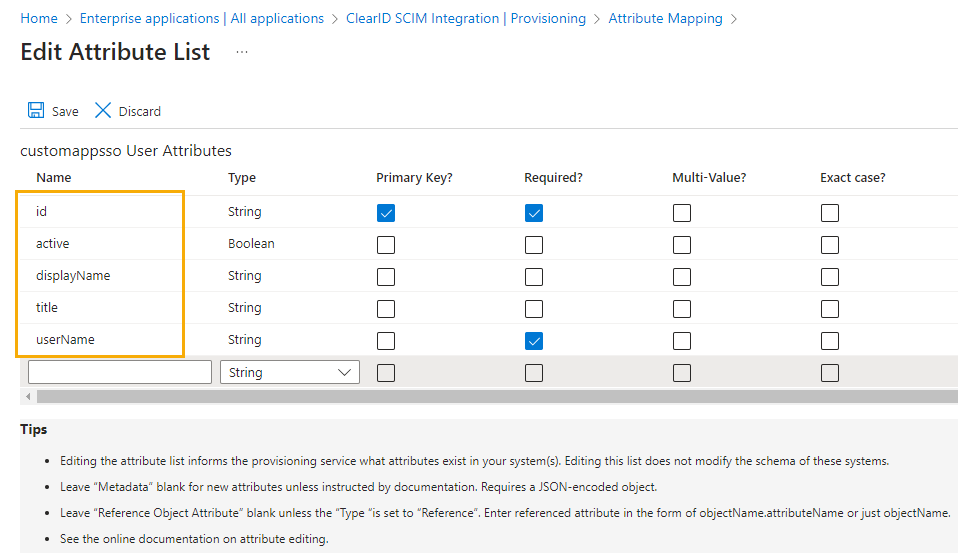
Click Edit attribute list for customappsso, and then click
Delete to remove all the unused default attributes.
Only keep the following:
id
active
displayName
title
userName
Click Save and then click Yes to
confirm your changes.
Add the ClearID schema attributes.
Only include the list of attributes available to
ClearID:
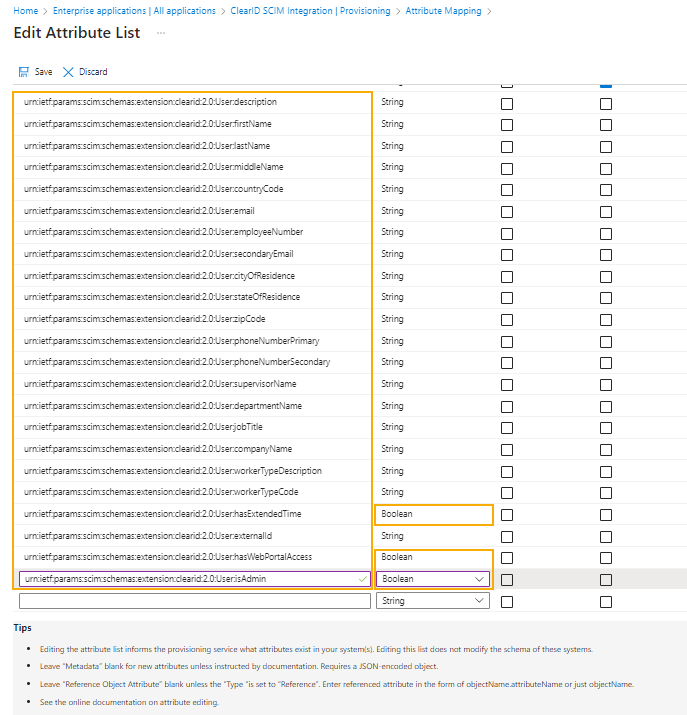
On the Edit Attribute List page, copy and paste an attribute
name from the preceding ClearID schema attributes code example into the
Name field and select the attribute
Type.
Almost every attribute has the type String, except for
three attributes that have the Boolean type:
hasExtendedTime, hasWebPortalAccess, and
UserisAdmin.
The ClearID externalId attribute is
the unique identifier that ClearID uses for synchronization. It’s mapped to the
unique objectId attribute in Microsoft Entra
ID.
Repeat for each attribute listed in the preceding ClearID schema attributes code
example.
Click Save and then click Yes to
confirm your
changes.
Add the ClearID attribute mappings.
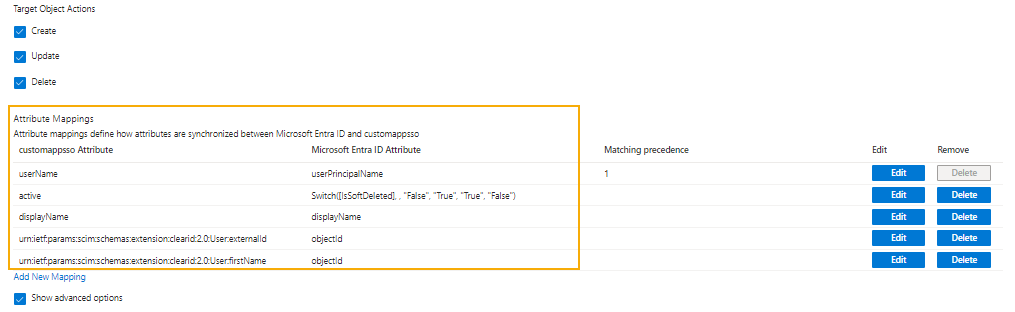
On the Attribute Mapping page, click Add New
Mapping.
On the Edit Attribute page, add the attributes that you
require from the attributes added earlier in step 7.
Include the following:
Mapping type: Direct
Source attribute: objectid
Target attribute: <your attribute value>
Click OK.
Repeat for each attribute added earlier and replace the target attribute value with
the next attribute you want to
add.
For a successful first synchronization, you need the following attributes. You can
add more attributes later.The objectid is the GUID in azure. It’s a hard-coded,
system-generated value that can’t be changed.
Click Save and then click Yes to
confirm your changes.
You can now close the window and return to the Provisioning
page.
After you finish
Determine the scope of your synchronization and turn on
provisioning.