2026-03-31Last updated
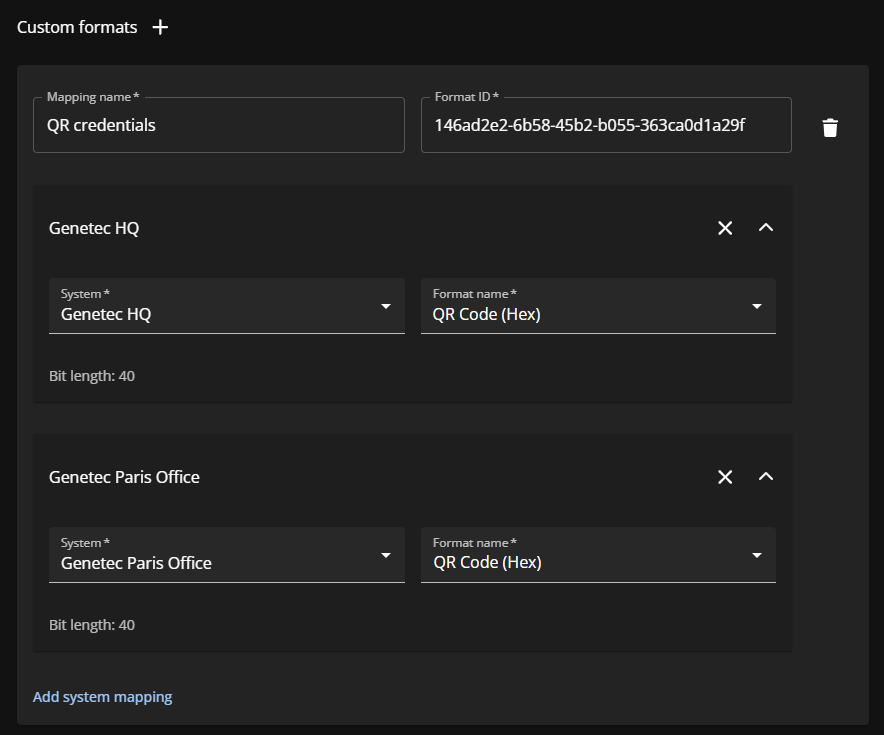
To synchronize custom credential formats across multiple Synergis™ systems, an
Account administrator must configure custom credential format mappings in the Genetec
ClearID™ portal.
Procedure
Adding custom card formats in Config Tool
-
Access Config Tool on your primary Security Center system.
-
Refer to the Security Center Administrator Guide to create custom card formats.
-
(Optional) Select your custom card format and click Edit,
then click Export.
The custom card format is exported as an XML file. You can import the XML file
into your other Security Center systems.
-
Access Config Tool on your secondary Security Center system.
-
Open the Access control task, and click the General
settings view.
-
Under Custom card formats, click Add an
item (
).
-
In the Custom card format editor, do one of the
following:
- Manually add the same configuration you added in your primary system.
- Click Import and select the XML file you exported from
your primary system.
-
Click .
Configuring custom card format synchronization in ClearID
-
In ClearID, click .
-
Ensure one of the following credential synchronization modes is selected:
- Use a specific access control system as the source of credential
synchronization
- Use the system associated with the primary site of the identity as the source of
credential synchronization
For more information about credential synchronization modes, see Configuring credential synchronization.
-
Click
next to
Custom formats in the Credential types and
formats section.
-
Enter a name for the mapping.
-
Define your system mappings:
-
Select your primary system from the System list.
-
Select your custom credential format from the Format name
list.
-
Click Add system mapping.
-
Select your secondary system from the System list.
-
Select your custom credential format from the Format name
list.
You must select the same custom card format for both the primary and secondary
systems.
-
Click Save.