To automate role assignments based on identity attributes and ensure access dynamically
updates when an employee changes departments or locations, Account administrators and Role
owners can configure role-based access control policies in Genetec ClearID™.
What you should know
Each role can have up to 25 policies, each with up to 25 conditions.
Procedure
From the homepage, click Access management
> Organization
> Roles and select a role.
Click Provisioning policy, and then activate it.
Enter a meaningful description.
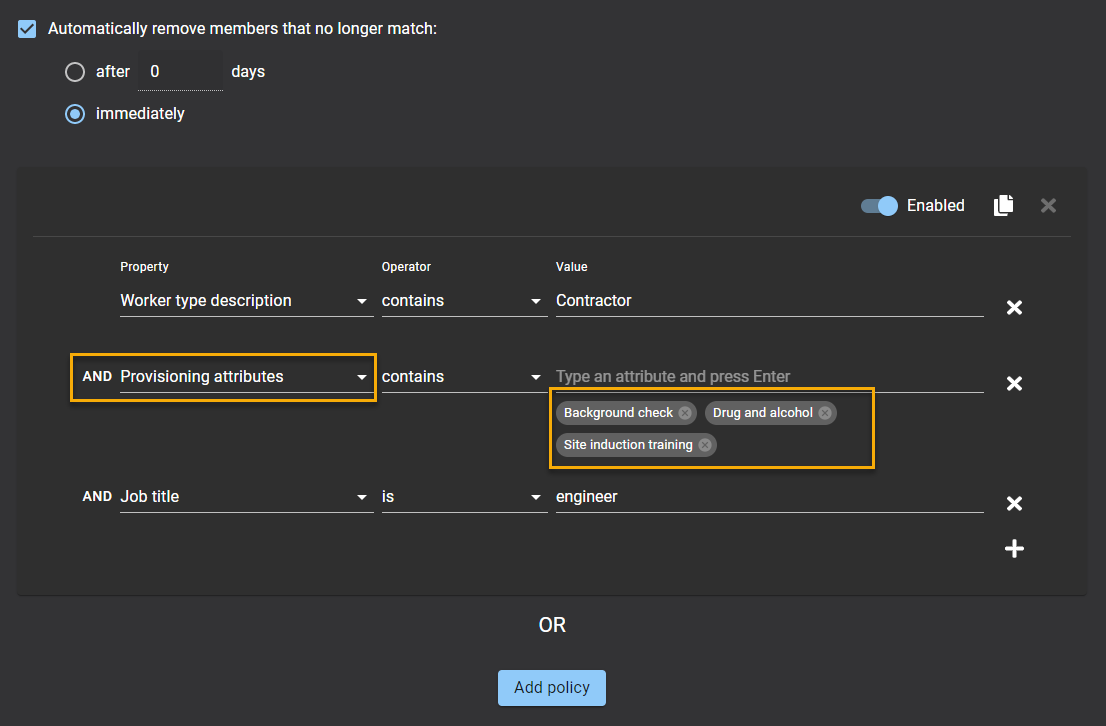
(Optional) Configure your automatic removal settings:
Select Automatically remove members that no longer
match.
Choose:
After a specified number of days.
Immediately.
For example, an IT role member who changes to a Developer job can keep access for 7
days for transition support.
Add policy rules:
Select the Property type.
The listed property types are identity field attributes that can be found in the
general details of any identity.
You can only select roles that you are a Role
manager for.
Provisioning attributes might include things like vehicle or
licensed vehicle, background check, drug and alcohol tests, NDA, Safety training,
site induction training, and so on.
Properties also include any identity
custom fields configured in the system. You can enter or select values corresponding
to the selected identity custom field property.
The following custom field
data types are not supported:
Date
Decimal
Date Time
Select an operator:
Contains
Does not contain
Is
Is not
Enter a value or select an option that relates to the property type you
selected.
The operator and value options that are displayed depend on the selected property
type.
(Optional) Add custom provisioning attributes:
Select the provisioning attributes property.
Select an operator:
Contains
Does not contain
Enter custom attribute values.
The policy triggers only when the identity includes all specified attribute
values.
(Optional) Disable a rule by setting the Enabled slider to
Disabled.
(Optional) To duplicate a rule or set of rules, click .
(Optional) To remove any policy rules, click .
Click Save.
Users are now automatically added to or removed from roles based on their
attributes.

 .
.
 .
.